Transfer Parts Using the Ordering List
Transfer Parts Using the Quick Transfer Tool
Transfer Parts Using the Ordering List
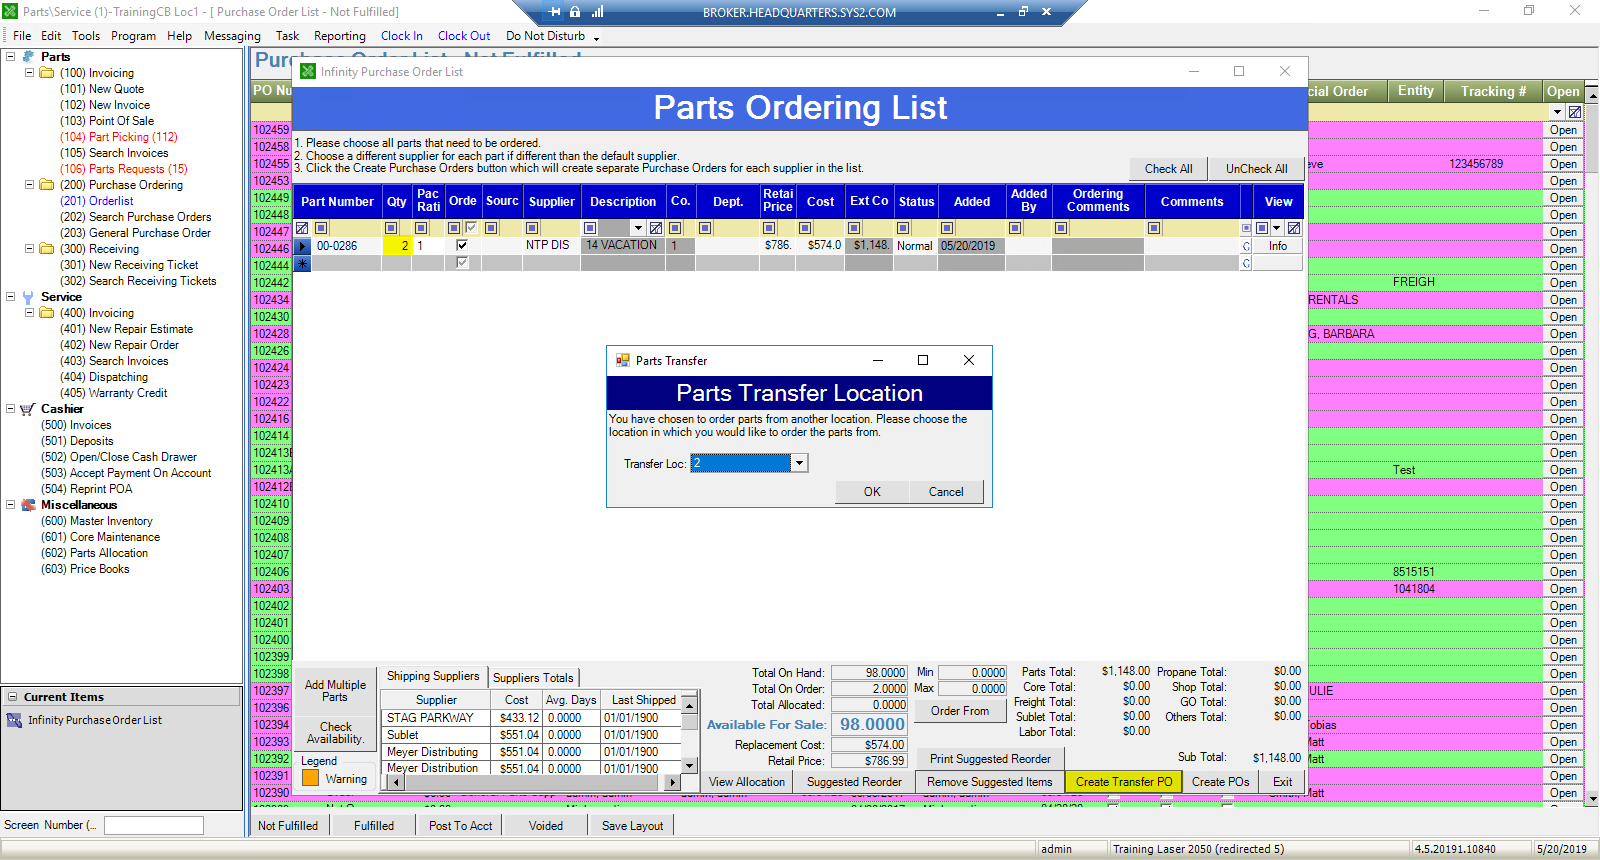
1. In the Parts & Service module, select ‘201’ Orderlist and add the part(s) you want to transfer to your location. Enter a quantity for each part. Then press the ‘Create Transfer PO’ button and select the location you want to order the parts from. (In the example below I am creating a Transfer PO for 6 Brake Pads from Company 2)
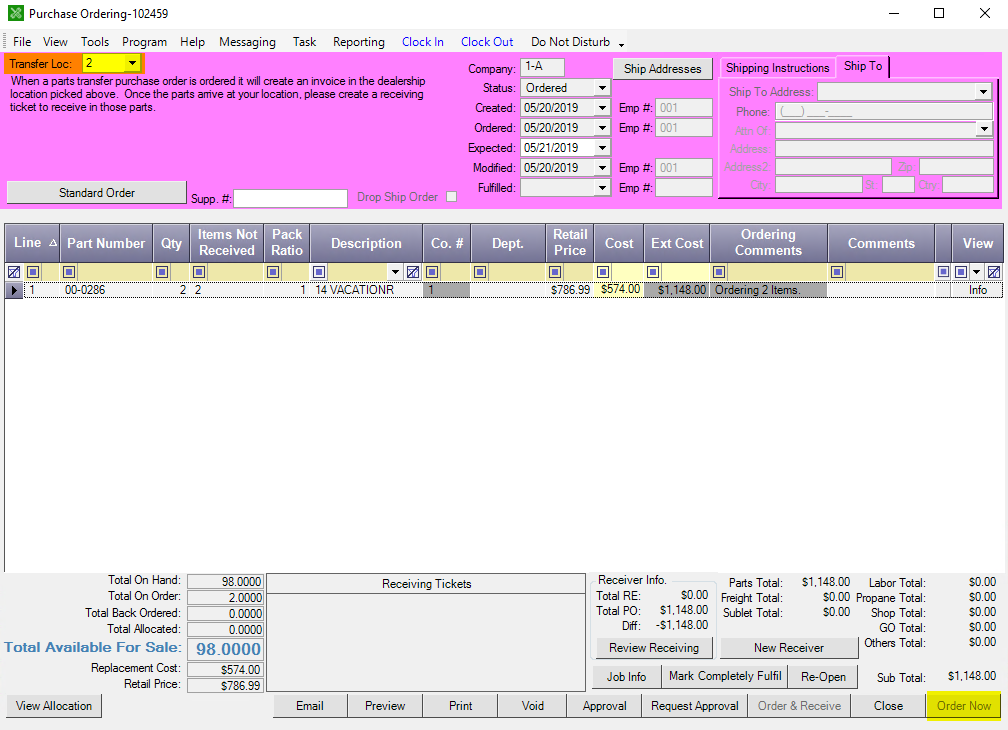
2. This will create the Transfer PO for you. This will have a disclaimer in the top left corner that is unique to transfer POs. This message tells you that when the ‘Order Now’ button is pressed a parts invoice will be created at the location you select from the ‘Transfer Loc’ dropdown menu. Verify that the Quantity and the Transfer Location are correct, and then press the ‘Order Now’ button.
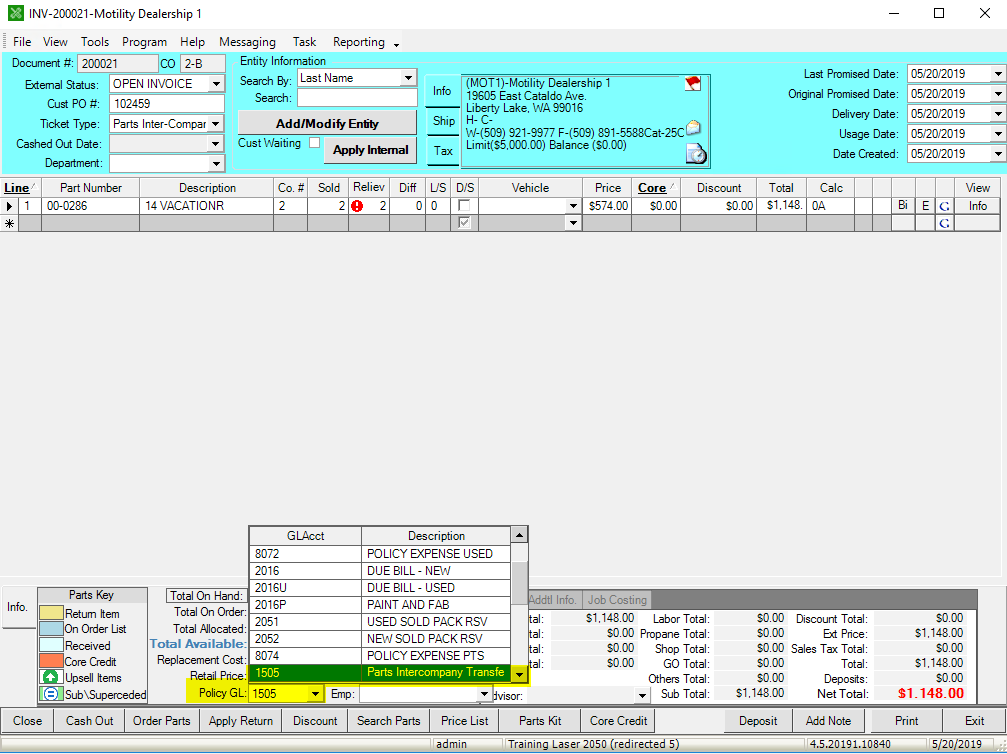
3. At the location you’re requesting the part(s) from, a parts invoice will be generated. A user at that location will open the invoice and cash it out to a policy account, ideally this should be a ‘Parts Intercompany Transfer’ account. They will cash out the ticket and send the part(s) to the location that made the request.
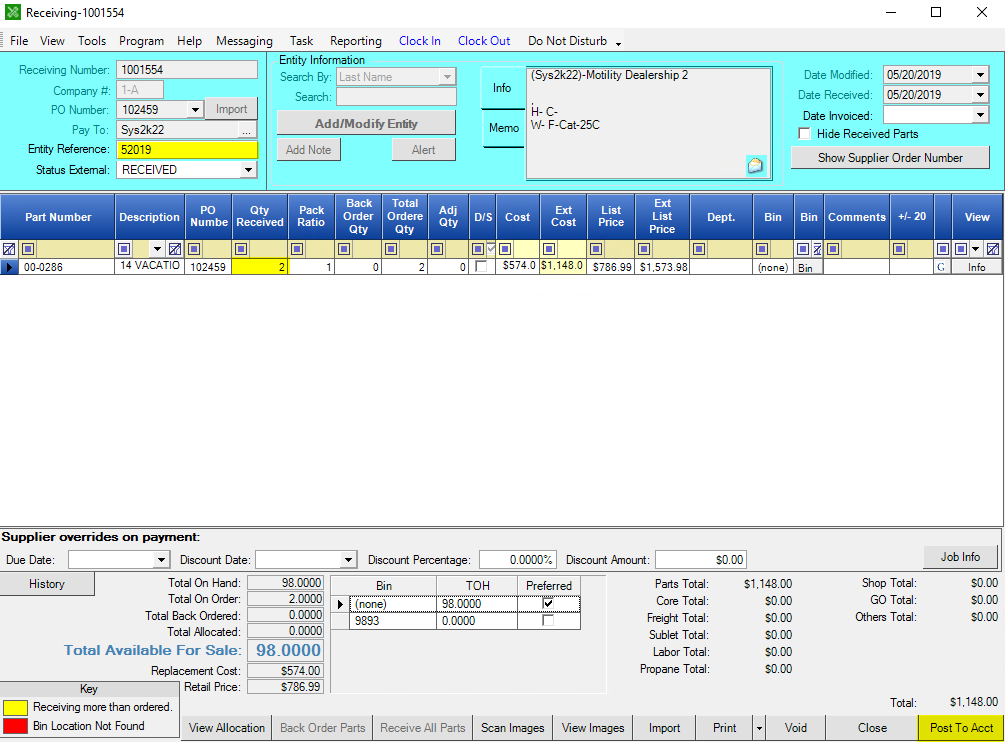
4. When the part(s) is/are received you will open the original Purchase Order to start a receiving ticket, and receive the part(s) in like a normal receiving ticket (Create an Entity Reference #, Update Qty Received, Press the Receive Now button). This will update your total quantity on hand.
Transfer Parts Using the Quick Transfer Tool
1. Open the Parts & Service module and select Tools > Inter-Company Quick Transfer
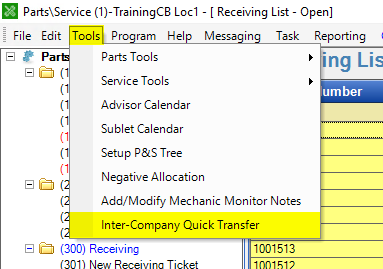
2. In the top part of the transfer window enter the Profit Center (PC) you want to transfer the part(s) from, and then select the location you want to transfer the part to. Finally enter your part number or press the ‘…’ button to open a master inventory search window to look up the part(s).
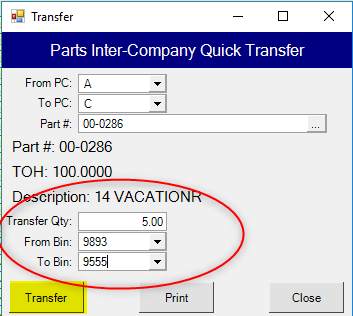
3. Enter the quantity being transferred between the two locations in the ‘Transfer Qty’ field. Next select the bin that the part is being removed from on the ‘From Bin’ dropdown field, then select the bin that you want the part to be received into, from the ‘To Bin’ dropdown field. Press the ‘Transfer’ button and you’re done. Accounting transactions will be generated at both locations to reflect the changes in inventory levels.