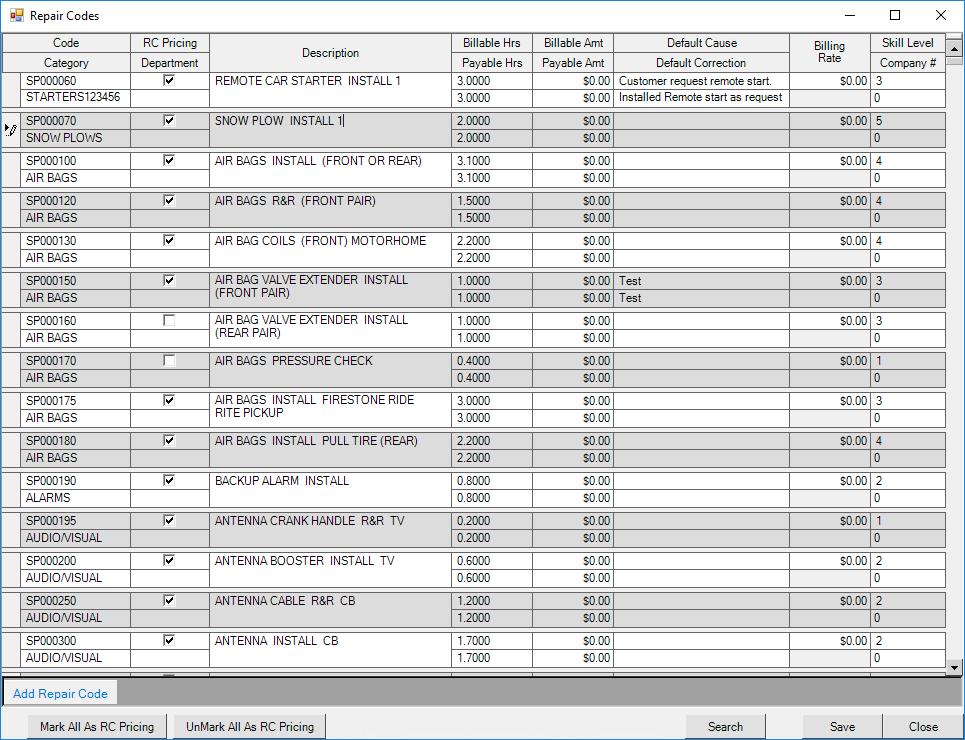
Repair codes allow you to set up common jobs with all the relevant information filled in. This will let you add the jobs quickly to a service invoices. This is also where a list of flat rate jobs can be entered.
Add a Repair Code
- Open the Parts & Service module.
- Choose the Edit menu in the upper left of the screen.
- Hover over Modify to expand the submenu.
- Choose the Repair Codes option. This will open the Repair Codes window.

- Select the Add Repair Code button in the lower left of the window. This will add a new, blank record.
- Enter your desired information.
- Select the Save button in the lower right of the window.
Repair Code Screen
Enter a Code. This will be what is typed into the repair code column on a service invoice.
Check the RC Pricing box if you want to override the mechanic's normal pricing and use the pricing information entered in the repair code record.
You can enter a Category for the repair. This will show as an option when pulling the Repair Code Listing report.
Choose the Department for this repair from the dropdown.
Enter a Description of the repair. This shows on the customer invoice and in the RO when searching for a repair code.
Optionally, you can enter a number of Billable Hours to set as the default.
Optionally, you can enter a billable dollar amount into the Billable Amount field.
Optionally, you can enter a number of Payable Hours to set as the default.
Optionally, you can enter a payable dollar amount into the Payable Amount field.
Enter a Default Cause and a Default Correction to have this information populate to the service ticket when this repair code is selected.
Enter a dollar amount into the Billing Rate field to have this apply as the labor rate when this job is chosen.
Select the Skill Level required for mechanics to complete the repair.
If this repair code will only be available in a single location, choose the location number from the Company Number dropdown.