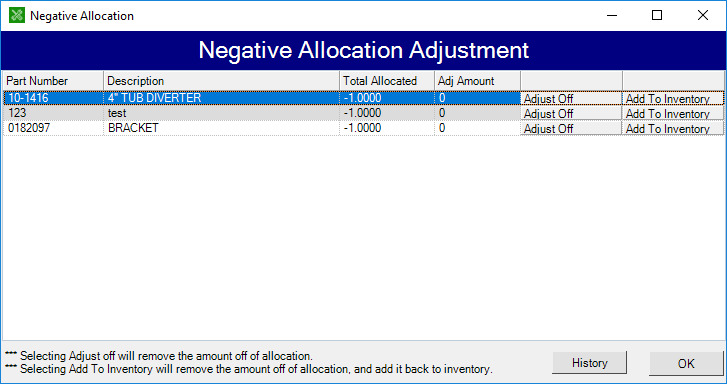
When parts have been added to a parts invoice or designated for use on a service invoice, they are marked as allocated. When parts are returned, they can show with a negative allocation amount. The negative allocation tool is used to clear the negative allocated quantities.
- Open the Parts & Service module.
- Select the Tools menu in the upper left of the screen.
- Choose the Negative Allocation option from the menu. This will open the Negative Allocation Adjustment window with a list of parts.

- Enter the amount to adjust in the Adj Amount column.
- For each part that you wish to adjust, you can choose the button to the right side of that part's row.
-
- Adjust Off - Choose this button to simply remove the negative allocation. This will not change the quantity on hand of this part.
- Add to Inventory - Select this button to remove the negative allocation and add the quantity back to inventory. This will raise your on-hand quantity of the part.
- Click the save button when done.