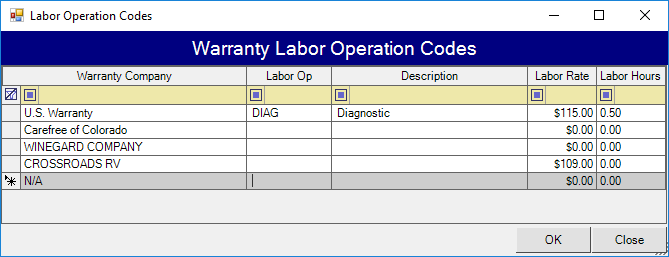
Labor op codes are similar to repair codes, but used only for warranty jobs, usually if the warranty company designates that a specific job is at a particular rate and/or allowed a designated amount of time.
Add a Labor Op Code
- Open the Parts & Service module.
- Choose the Edit menu in the upper left of the screen.
- Hover over Modify to expand the submenu.
- Choose the Labor Op Codes option. This will open the Warranty Labor Operation Codes window.

- The bottom row in this list is blank. Clicking in this row will allow you to enter a new code.
- You can choose a warranty company to restrict which company the code will display for, or leave the warranty company as N/A for this code to be available for all warranty companies.
- Enter a code.
- Optionally, you can add a description to the code.
- If the code will override the labor rate or number of hours, you may enter them into the respective columns to the right.
- Click OK to save the changes.
Apply Labor Op Code to RO
- Open the Parts & Service module.
- Choose the Service Invoicing option from the menu tree on the left side of the screen.
- Locate and double-click over the invoice row, or choose the open button to open the record.
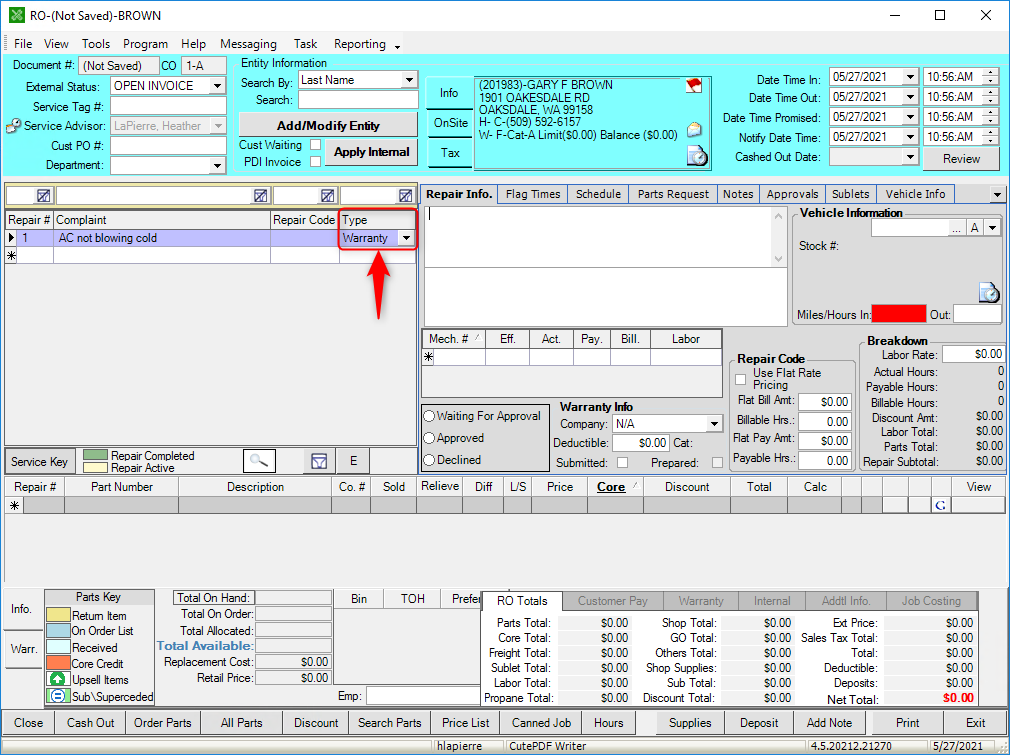
- Choose the warranty repair type for the applicable job(s).

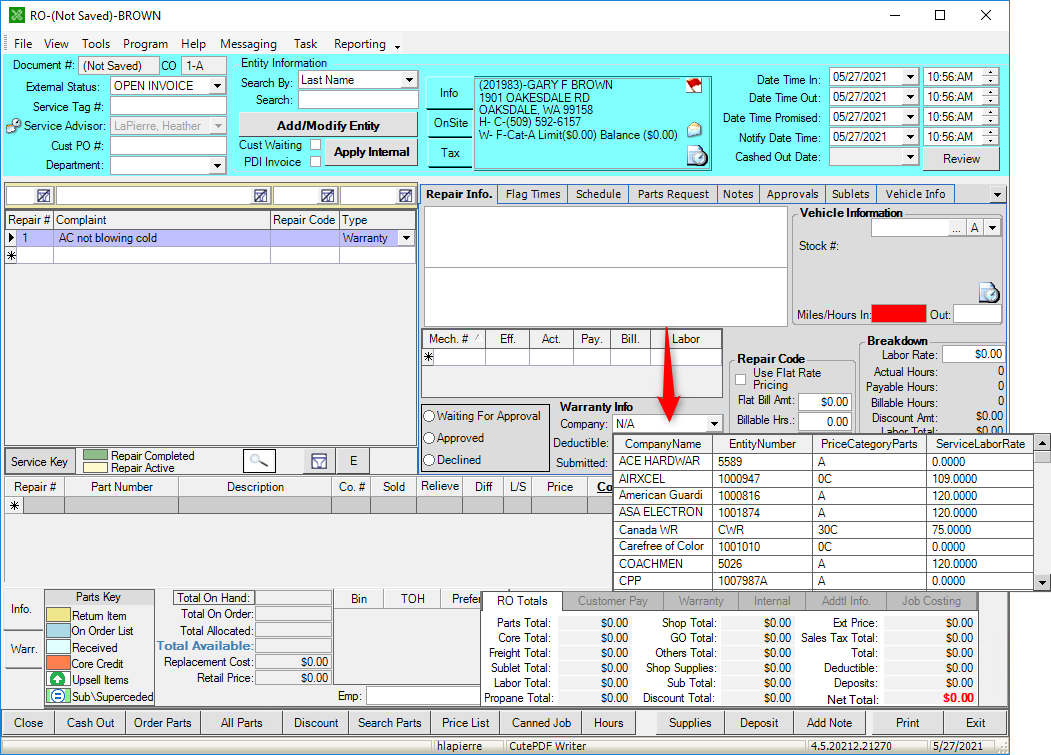
- Select the warranty company in the Warranty Info section.

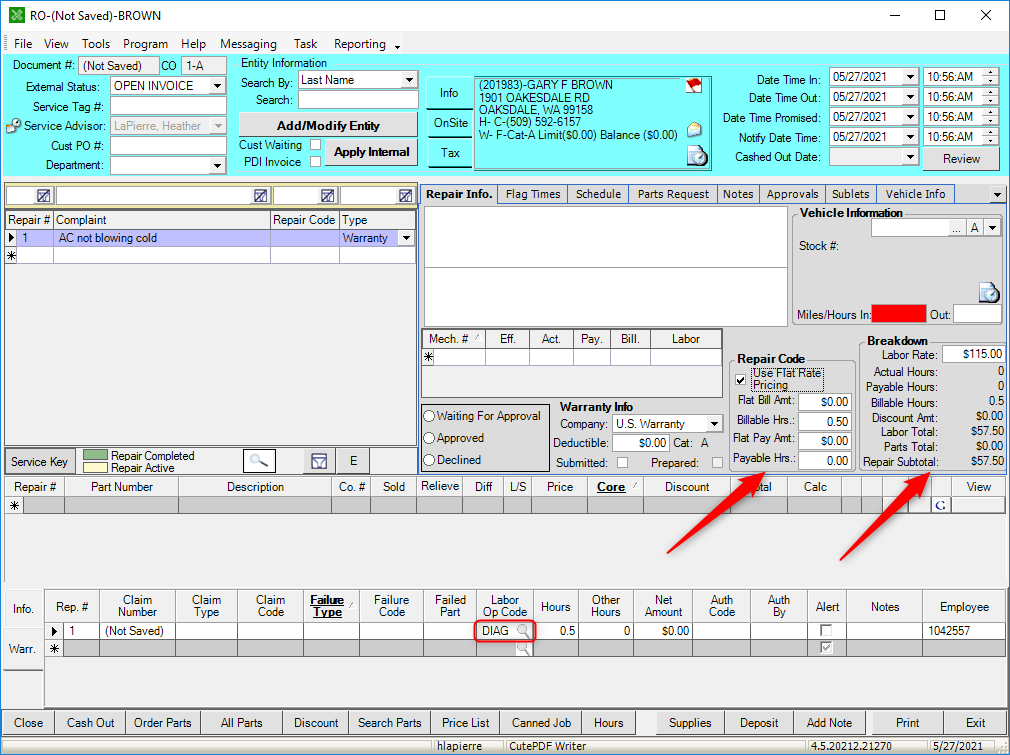
- Click the Warranty tab that now shows in the lower left of the RO.
- Click in the starred gray row. This will create a new row and automatically fill in a claim number. You can change this when the warranty company provides a claim number.
- Type the labor op code into the column. If you do not know the code, you can select the magnifying glass button to open a lookup screen. This will update the RO with the hours and rate, if entered into the labor op codes list.
