This page is intended to show you how to operate the security module. You must have a deep understanding of how the MotilityAnywhere program works and how all the modules integrate to fully understand the permissions. For a more conceptual understanding, we recommend scheduling training time with a Motility Professional Service Consultant (additional fees may apply). Please contact Motility Training and Professional Services at training@motilitysoftware.com if you are interested.
| Searching in Security Lists | Copy Security User |
| Create a Security User | Disable Security User |
| Assign Security User to a Group | Re-enable Security User |
Searching in Security Lists
You can filter any list in security using the magnifying glass in each column header. Simply click over the magnifying glass to expand an option menu.
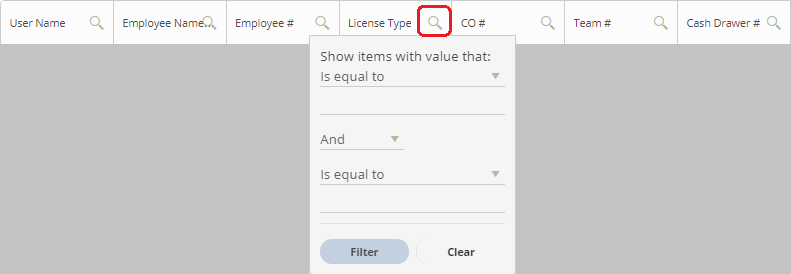
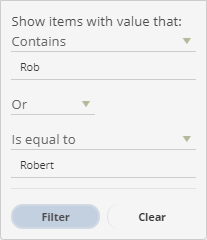
This allows you to find results that match, contain, or is in some way relevant to your entry. You may enter up to two different criteria.
Create a Security User
- From any module, click the user icon in the upper right of the screen. This will open a menu.
- Choose the Settings option. This will open the settings screen.
- Select the Security Management tab. This will show a list of security users.
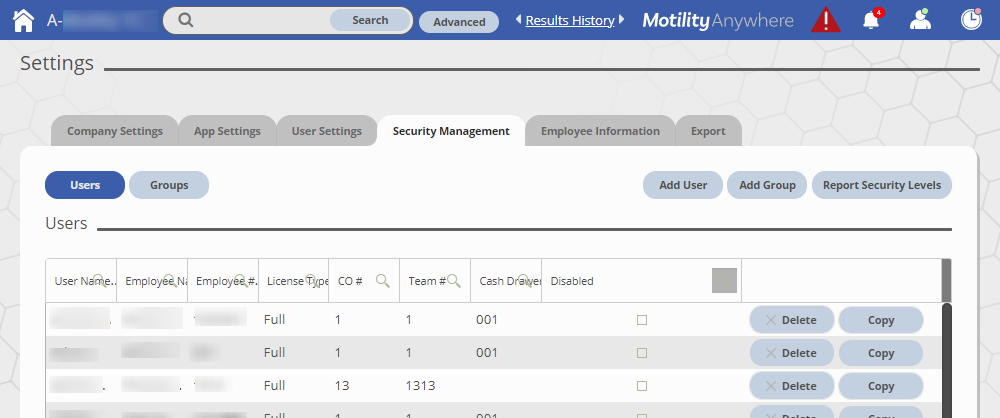
- Choose the Add User button on the right side of the table header. This will open the New User window.
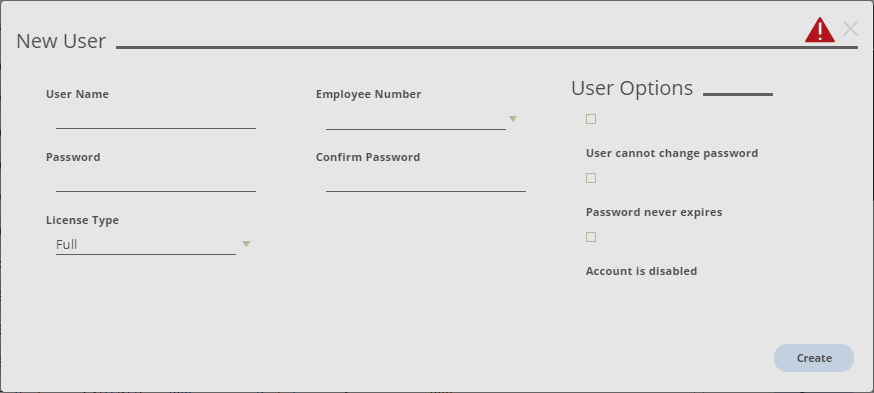
- Enter the employee’s user name. We recommend setting this to be the new employee’s first name and last name, separated by a period. (Example- Firstname.Lastname)
- Enter the new employee’s number or use the dropdown arrow to choose from your list of employees.
- Enter a password for your employee. You will need to re-enter the password in the Confirm Password field.
- Select the Create button. This will create the security user and return you to the list of security users.
Assign Security User to a Group
- Double-click over the user that you wish to assign to a group. This will open the user properties window.
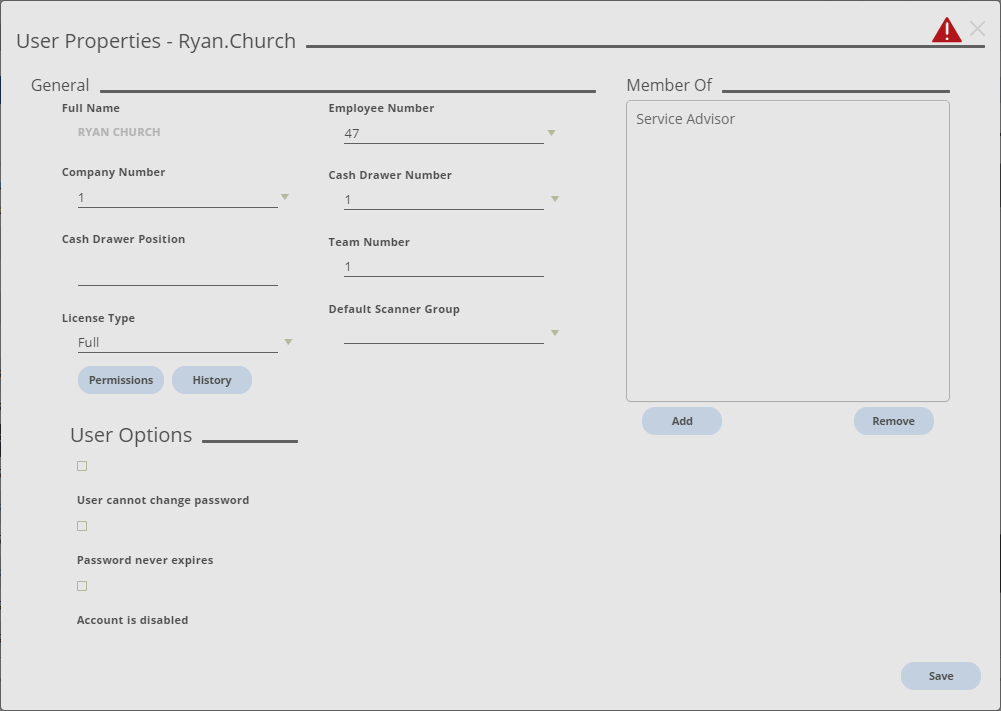
- On the right side of the window, click the Add button. This will open a popup window with a list of security groups.
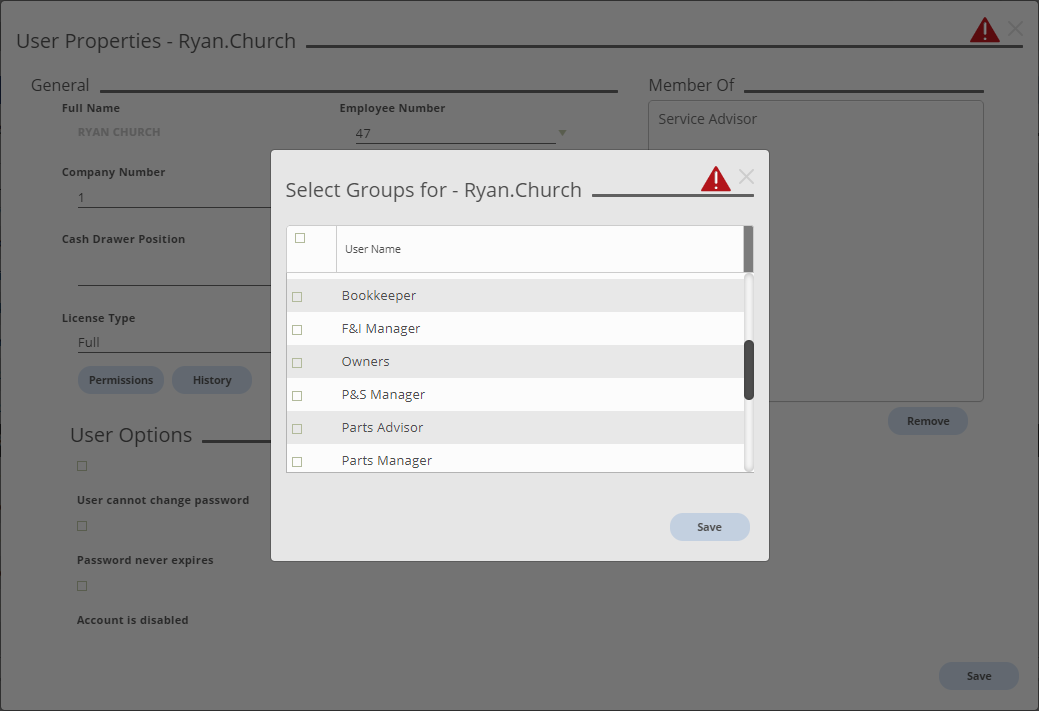
- Click the box or boxes for the security group or groups that this user will be assigned. Be careful assigning a single user to multiple groups. Often a permission from one group blocks access to a process, screen, or field while the other group does not.
- Click the save button. This will assign the permissions of the selected group(s) to this user and return you to the user properties window.
- Click the save button, then the X in the upper right of the window. This will return you to the security users list.
Copy User
- From any module, click the user icon in the upper right of the screen. This will open a menu.
- Choose the Settings option. This will open the settings screen.
- Select the Security Management tab.
- Locate the user that you wish to copy from in the list and click the Copy button on the group's row. You will receive a popup window.
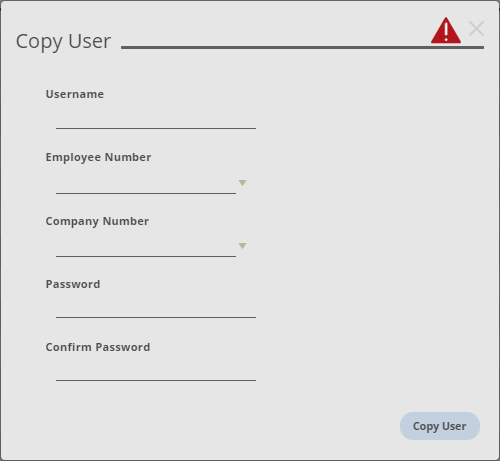
- Enter the new employee’s username. We recommend setting this to be the new employee’s first name and last name, separated by a period. (Example- Firstname.Lastname)
- Enter the new employee’s number or use the dropdown arrow to choose from your list of employees.
- Enter a password for your new employee. You will need to re-enter the password in the Confirm Password field.
- Select the Create button. This will create the new security user, copying the permissions and any group assignments from the original user.
Disable Security Users
- From any module, click the user icon in the upper right of the screen. This will open a menu.
- Choose the Settings option. This will open the settings screen.
- Select the Security Management tab.
- Locate the user that you wish to disable in the list and check the Disabled box on the user's row.

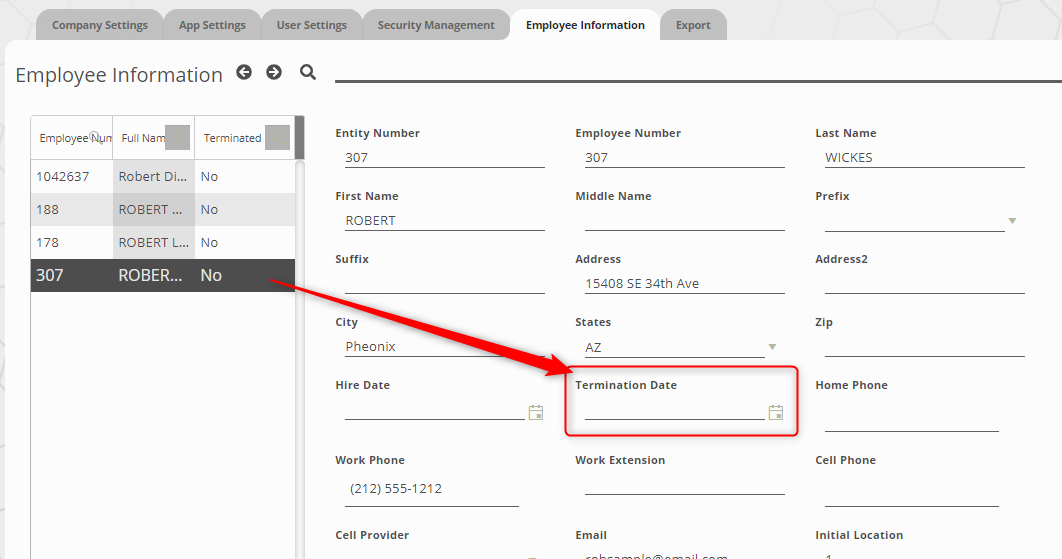
Alternatively, you can look the employee up in the Employee Information tab and apply a termination date to the employee. When you save you will receive a message letting you know that the user has been disabled in security.
Re-enable Security User
- From any module, click the user icon in the upper right of the screen. This will open a menu.
- Choose the Settings option. This will open the settings screen.
- Select the Security Management tab. This will open the list of security users.
- Click in the gray box within the Disabled column header to open the filter options.
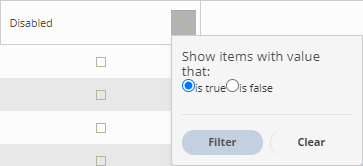
- Choose the "is true" option.
- Select the filter button. This will update the list of security users to display disabled users.
- Locate the user that you wish to re-enable in the list and uncheck the disabled box on the user's row. This will reactivate the security user.