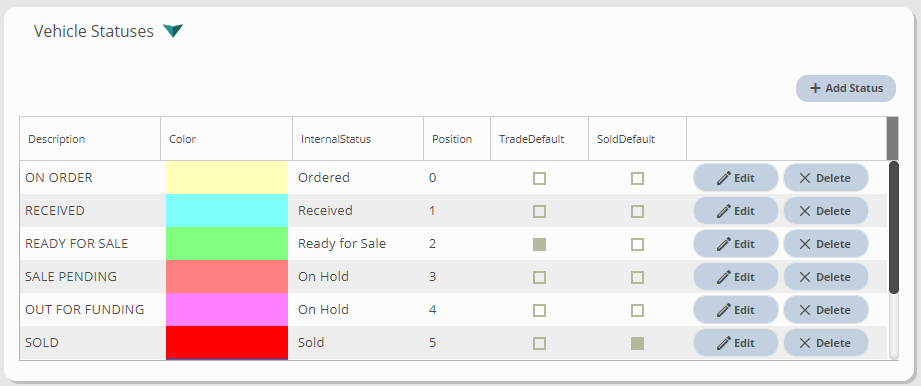
Unit or vehicle statuses are assigned to individual units. The statuses you create here can automatically update individual units to show the progression of the unit from the initial order until it is sold.
- From any module in MotilityAnywhere, select the user icon in the upper right of the screen to open the menu.
- Choose the Settings option from the menu. This will open a screen where, depending on your security permissions, you may view or update company settings.
- Select the App Settings tab.
- Click the Unit Inventory subtab on the left side of the screen.
- Click once over the Vehicle Statuses section. This will expand the section.

- To add a new status, click the Add Status button in the upper right of the table.
- Enter a description for the status. The status description is used in reporting. You can add as many new descriptions as you wish, but each has to correspond to an internal status.
- Optionally, you can select a color for the units to show when assigned with this status.
- Set the internal status that will correspond to the new status. Internal statuses are preset and cannot be changed. The available internal statuses are:
|
|
- Enter the order that you wish the status to show into the Position column. Higher numbers will show at the bottom of the list. If multiple statuses are set to the same position number, they will show alphabetically.
- Optionally, if you want this status applied to trade-in units automatically, check the Trade Default box. For example, if you want trade units to show available for sale immediately after the deal completes, we would check the box for the Ready For Sale Status in the image above.
- Optionally, if you want this status applied to units automatically when deals care washed, check the Sold Default box.
- Select the Update button on the row to save your changes.