This article reviews creating a new AR invoice. Entities must have an allowed balance entered into the AR Info tab to be able to have an AR balance.
Create New AR Invoice from AR Invoice List
Create New AR Invoice from Tools Menu
AR Invoice Actions (Save Quote, Invoice, Post, Void)
Create New AR Invoice from AR Invoice List
- Open the accounting module.
- Choose the AR Invoices option from the menu tree on the left side of the screen. This will open a list of existing AR invoices.
- Double-click over an invoice row or select the open button to open the record.
- Click the Add button in the lower left of the invoice. This will open a new, blank invoice.
Create New AR Invoice from Tools Menu
- Open the accounting module.
- Choose the tools menu in the upper left of the screen.
- Select the General PO and AR Invoices option.

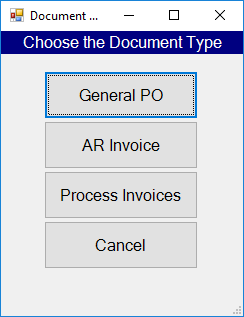
- Click on the AR Invoice button from the pop-up menu that appears. This will open a new, blank AR Invoice.

Enter AR Invoice Information
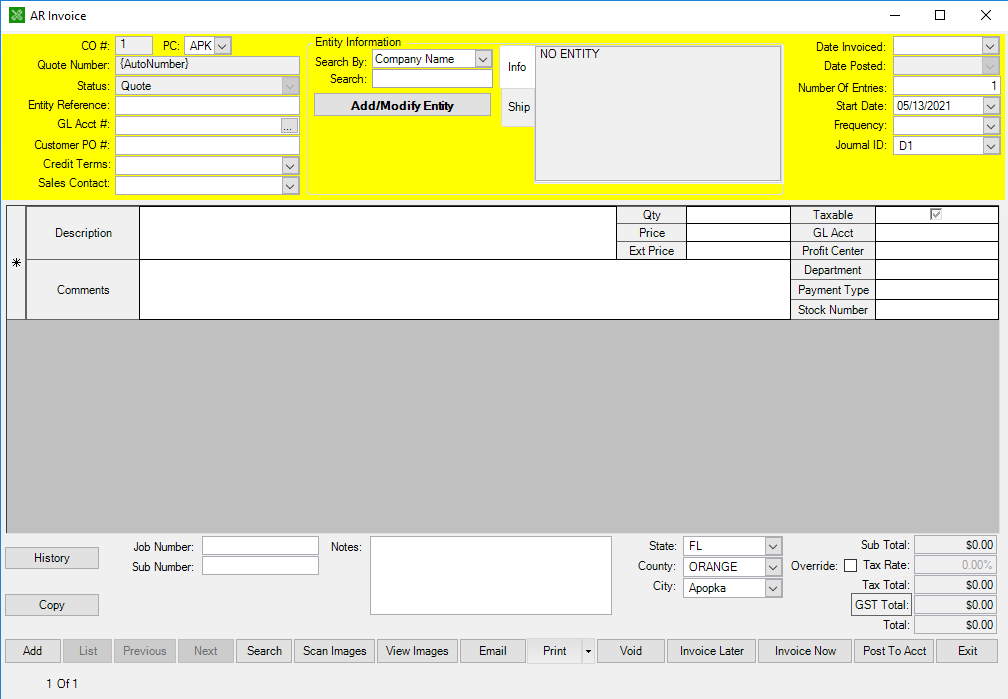
- At the center of the AR invoice header, you will search for the entity that owes your business. Find an existing entity by choosing which information you wish to search by and enter a search term, or select the Add/Modify Entity button to enter a new entity.

- Complete the left side of the header section.
The Company Number and PC will be automatically entered with the profit center that you opened the accounting module for, but you can change it if necessary.
Enter an unique reference number for this transaction into the Entity Reference field.
Choose the AR account number in the GL Acct # field by clicking the ellipsis button and searching for the applicable account.
The Customer PO # allows you to include a PO number from the customer for this transaction. This is optional.
If your business requires you to assign a term length (30 day, 60 day, 90 day etc.), you can choose the length in the Credit Terms field.
Choose one of your employees from the Sales Contact dropdown list, if there is a point of contact who will contact the entity.
- Enter the information on the right side of the header section.

The Date Invoiced will be the transaction date for the accounting entry. This will autofill with the date when the Invoice Now button is chosen.
The Start Date is the date that aging begins for this invoice. This date will autofill with the date that the invoice was created.
The Date Posted will automatically fill with the date the invoice was posted to accounting.
Enter a Frequency to set whether this is a single entry or if it occurs weekly, bi-weekly, monthly, quarterly or yearly.
Enter the Journal ID location for the transaction to be placed within the Accounting module.
- Complete the AR Invoice lines.

The Description should contain a short description of what the invoice is for.
Enter the number of items that are being sold/received into the Qty field.
Enter the individual Price for the amount per item. The Ext Price will automatically calculate using Qty and Price.
Check the Taxable box if the invoice will include sales tax.
Enter the GL account that will be credited for the invoice into the GL Acct field.
Optionally, you can enter the form or method of payment into the Payment Type field.
Enter the Stock Number if the transaction is involved with a specific unit (like for storage). This is optional.
- Complete the AR invoice footer section.

Optionally, you can add a Job or Sub number for the invoice.
Optionally, you can enter notes for the AR invoice.
Optionally, you can modify the taxable State, County, and City.

You may force a tax override by checking the Override box and manually entering a Tax Rate. You can view updated invoice totals at the bottom to ensure everything is calculating correctly.
Optionally, you can scan images for this AR invoice by using the button below.
AR Invoice Actions
- After entering all the AR invoice information, you can use the buttons in the bottom right of the invoice to perform different actions and update the AR invoice status.

Select the Void button if this AR invoice is inaccurate or needs to be removed for some reason. This will update the invoice status to voided.
Save your changes and hold the AR invoice for later by choosing the Invoice Later button. This will keep the new AR invoice in a Quote status.
Choose the Invoice Now button to update the status to Invoice and fill the date invoiced in the upper right of the AR invoice window.
Click the Post to Acct button to generate the appropriate accounting transaction. This will update the customer’s AR balance and credit the GL account chosen.
You can view the customer's AR balance in their CRM profile. You may also review the accounting transaction generated by using the reference number to search for the invoice in accounting.