If your business requires that checks be approved by one or more people, you can approve the checks by using this section of the program.
Set Permissions to Approve Checks
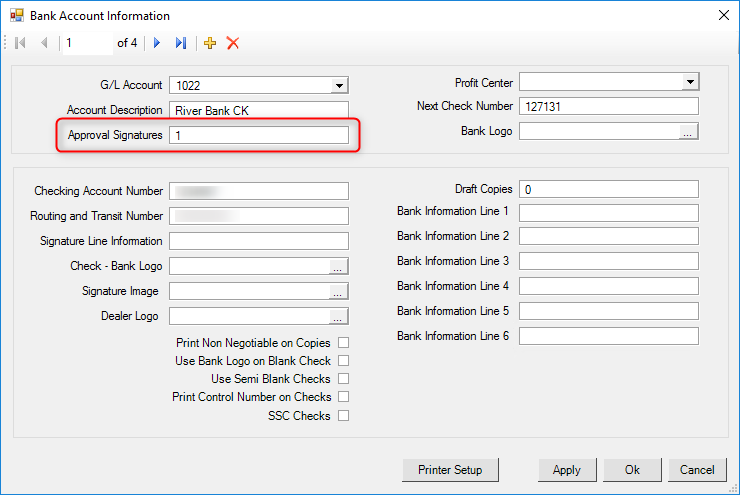
Set Number of Signatures per Account
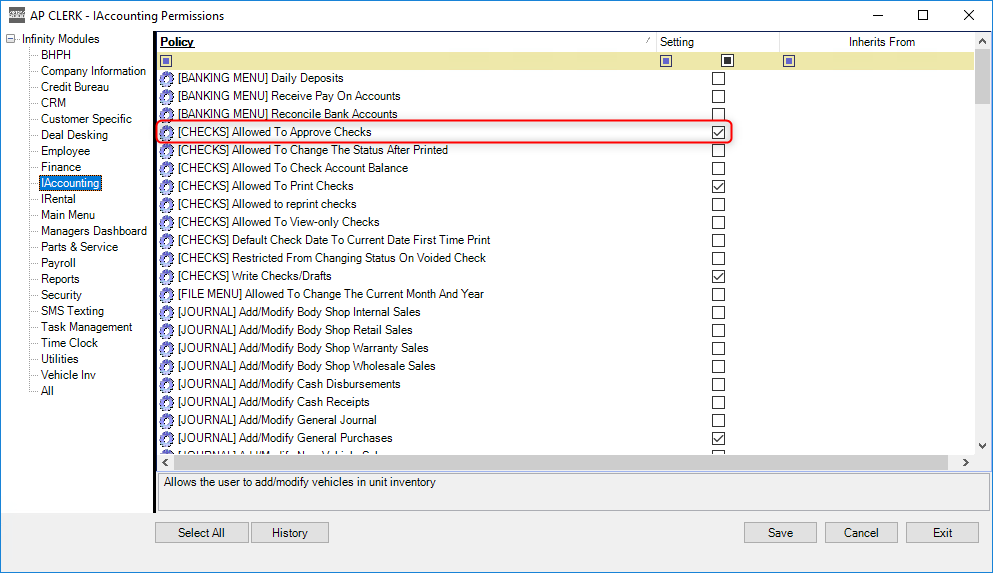
Set Permission to Approve Checks
Note: We recommend setting this permission for a security group rather than for an individual. This way, you have more than one person who can approve checks.
- Open the security management module.
- Locate the desired employee or group for the change in the list and double-click over the record to open the properties window.
- Click the permissions button to open the permissions window.
- Choose the iAccounting option from the menu on the left side of the permissions window.
- In the list of permissions to the right, check the box for the [CHECKS] Allowed To Approve Checks option.

- Choose to save your changes, then exit the screen.
Set Number of Signatures per Account
- Open the CRM module.
- Open the entity profile for your bank.
- Choose the AP tab.
- Select the Bank Account Information button to open the bank account information window.

- Enter the number of signatures that you wish to require for checks written against this account.
- Select the apply button.
There may be more than one account for a single bank entity. Once you have the bank account information window open, you can move between these accounts by using the small blue arrows in the upper left of the window.
You will need to repeat these steps for each bank entity for which you will require signatures.
- When finished, click the close button.
Approve Checks
- Open the accounting module.
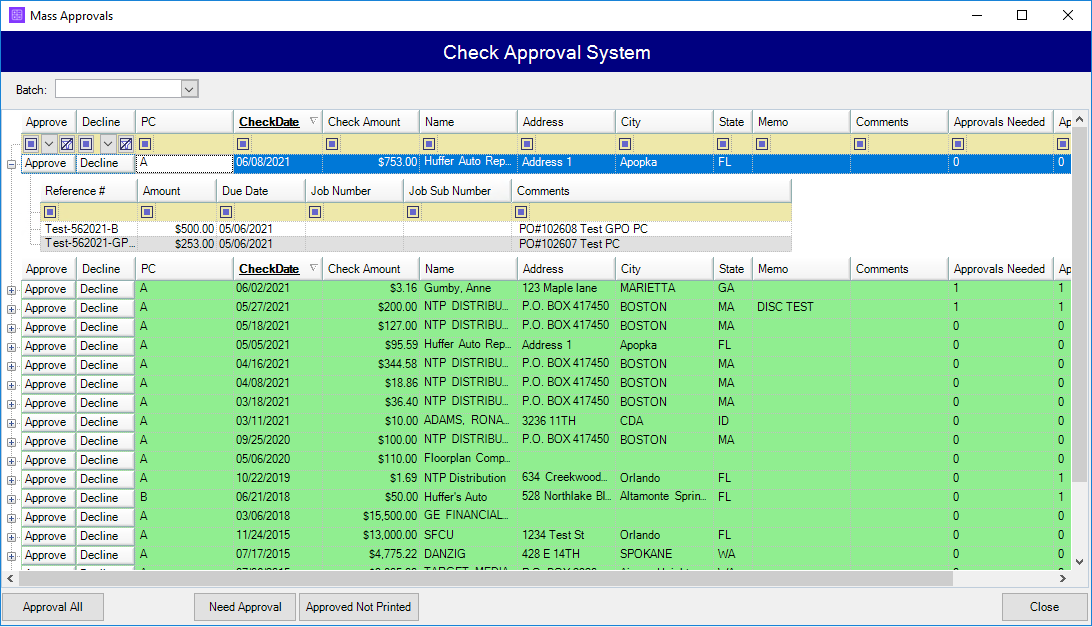
- Select the (07) Check Approvals option from the menu tree to the left side of the screen. This will open the check approval system.

If you wish to narrow your results by batch, choose the Batch from the dropdown selection in the upper left of the window.
You can change which checks you are viewing by using the Need Approval and Approved Not Printed buttons at the bottom of the screen.
Expand your view of the references that the check is for by selecting the small plus sign to the left of the row.
You may approve a single check by selecting the Approve button on that check's row.
You may decline a single check by selecting the Decline button on the row.
Click the Approve All button in the lower left to quickly approve all of the checks in the list.
- Once you have finished approving or declining checks, choose the close button in the lower right to exit the approval window.
Approved checks will be able to be printed.