Infinity’s Accounting module includes multiple features for accounts receivable including AR Write-offs, Auto Pay and Receiving Payment on Account. This will ensure that your Accounting department can keep track of all receivables into the system so that, in tandem with accounts payable, you can reconcile your bank statement monthly to keep accurate finances.
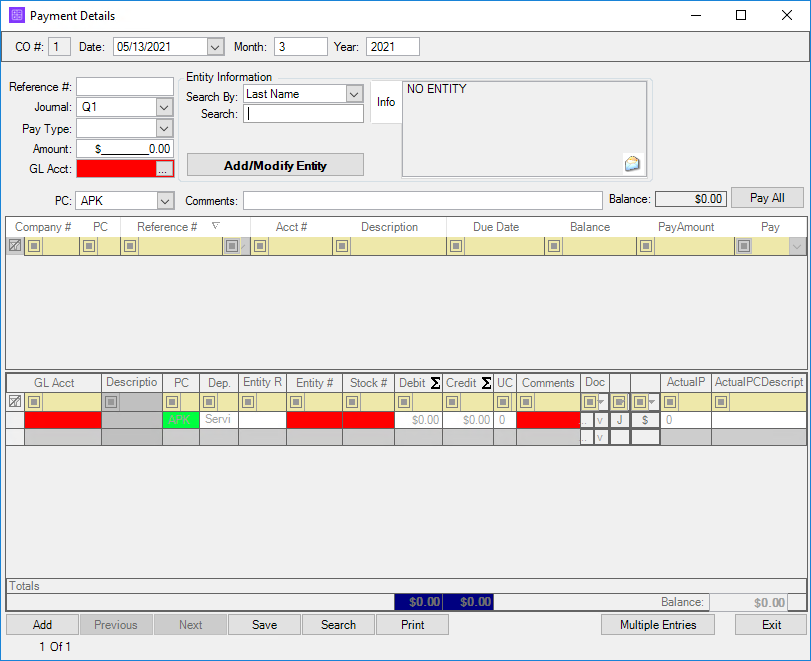
To receive a payment on an outstanding balance owed to your dealership, begin by clicking on (01) Receive Pay on Accounts and click Add to begin receiving a payment.

This screen should look familiar – it is very similar to the (00) Write Checks/Drafts screen, except instead of seeing payables your dealership owes, you are seeing a customer's amount owed to your dealership in the form of a receivable.
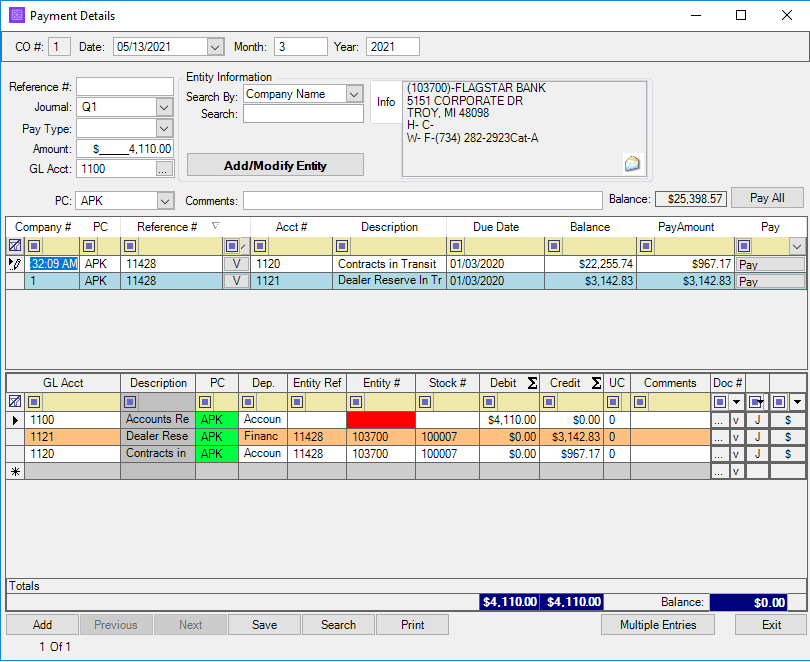
Begin by selecting an entity with an outstanding balance and fill out the appropriate information in the top left. The Pay Type should correspond with the medium of payment, the amount to the total amount paid on this transaction and the GL account to the where payment is being applied.
To receive payment on an outstanding balance owed by this customer:
You can also click “Pay” to pay the amount in full. If it is a partial payment being made, type in that amount in the Pay Amount field.

Once the Pay Amount is filled in or “Pay” button is clicked, the transactions lines will be created below as a balancing transaction, debiting the AR account selected and crediting the payment to the GL account where it is owed. Note that the functionality of the ellipsis, “v”, “J” and “$” buttons remains the same as in the (00) Write Check/Drafts article listed previously. When you are finished press Save and Print, then move onto the next Entity if you wish to receive additional payments.
Multiple Payments
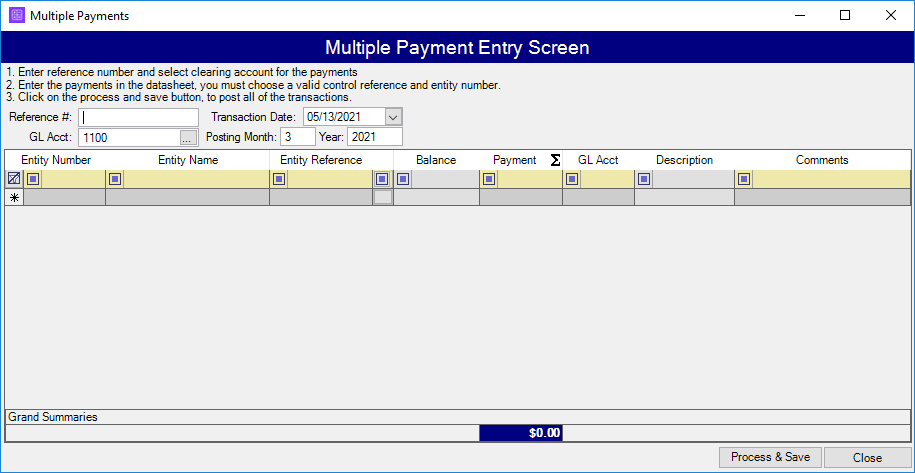
If you are receiving multiple payments from different entities, it may be easier to use the “Multiple Entries” feature rather than creating each receivable payment individually. To do this, begin by clicking “Multiple Entries” to enter the Multiple Payments screen.

From the Multiple Payments screen, you will start by adding a reference # to identify the transaction, a transaction date and posting month and a GL clearing account for the payments to by received into.
Next you will add all of the entities whose payments are being received; select their constituent balances owed in the Entity Reference field and fill in the payment amount. Add the GL account (the AR account that will be credited for these payments) and a comment if necessary. The total amount of the payments made will be displayed on the bottom of the window in a blue field. When you are finished, hit “Process & Save” to finalize the payment entry.