Journals comprised of GL accounts are the bulk functionality of the accounting module. These ledger accounts store all of the transaction information made within your dealership, allowing full control as to what gets posted to the journals and how. Understanding how these accounts work and interact with one another, alongside the system of balancing credits and debits is the foundation of mastering the Accounting module of Infinity.
Add a New GL Account
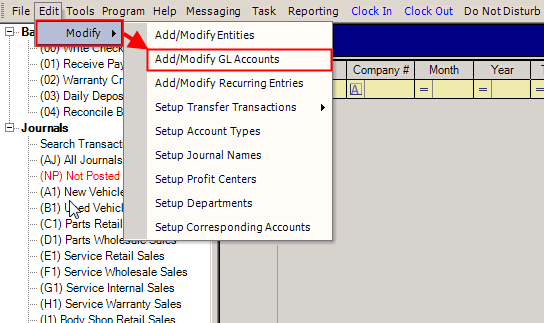
- Open the Accounting module.
- Select the Edit menu in the upper left of the screen.
- Select the Add/Modify GL Accounts option.
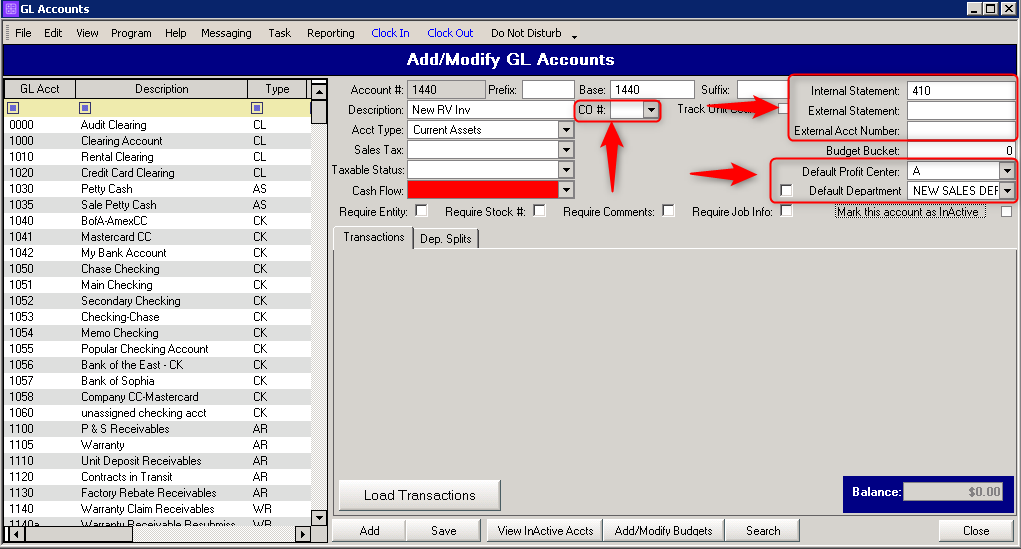
- Click the Add button to create a new GL account and fill out the pertinent fields.

- Use the Base field for your account number to keep things simple.
- Fill out the appropriate Description, Acct Type, Sales Tax, Taxable Status and Cash Flow fields.
- If this account is location or department-specific, you’ll want to use the CO#, Default Profit Center and Default Department fields to specify this information. Otherwise the GL account will be accessible by all locations/departments and show up on all departmentalized reports.
- The Internal Statement, External Statement and External Acct Number are to be used for the External Financial Statements that can be exported out from the system.
- Click the Save button at the bottom to save your changes.
Scheduled Accounts
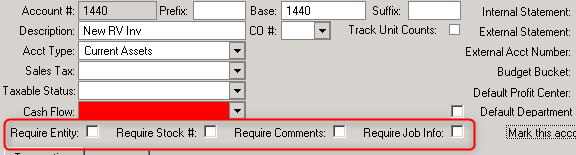
A scheduled account within Infinity will require a specific field to be entered; this can either be an entity reference, stock number, comment or job info, depending upon the box selected. Otherwise the transaction will remain unposted until a reference is entered. Examples of common accounts to be scheduled:
- Inventory GL accounts – Require Stock #
- AP GL accounts – Require Entity #
- Payroll GL Accounts – Require Comment
If the “NEW RV INV” account 1440 is scheduled to require a stock #, it will ensure that all transactions posted to this vehicle (whether it’s entered into inventory or PDI work before a deal is washed) will be attached and can be found on the vehicle's Financial tab in Unit Inventory.
Modify an Existing GL Account
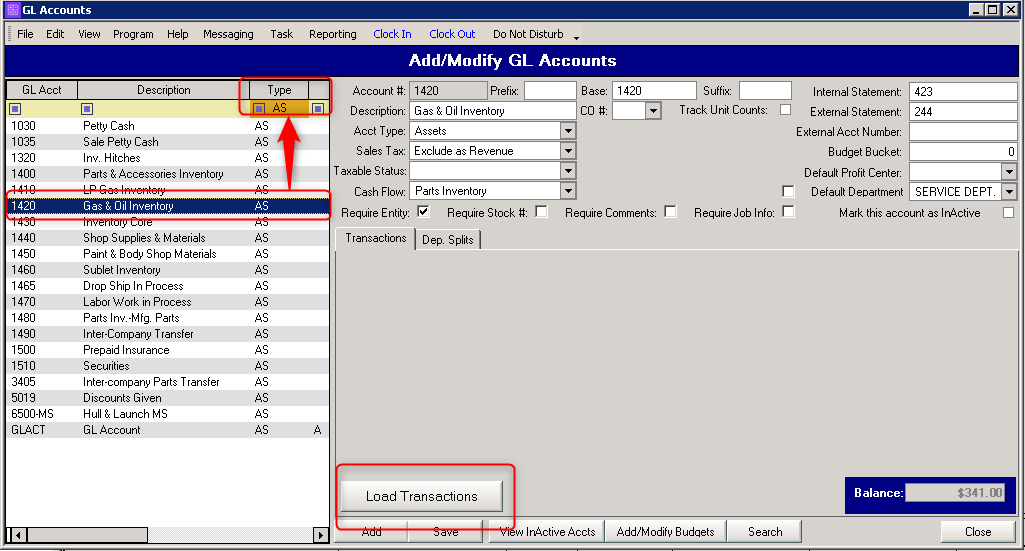
To modify information on an existing GL account, first navigate to the account by using the yellow filter bar at the top of the list, or use the scroll bar to browse all accounts. Being familiar with the yellow filter bar will allow you to quickly navigate through lists.
Once you’ve found the account you’re looking to review, clicking over it in the list will display the GL account information on the right.
If you wish to review transactions within the account itself, you can click “Load Transactions” to see all the posted transactions to that account. In this example, a Parts & Accessories inventory account # 1500 is showing all the invoices and physical inventory adjustments that have been posted. You can then use this information to audit the account or run a report for more research detail.
You can also customize your accounts with features that can be beneficial for the reporting of your financials. These features include departmental splits and creating specific budgets that a GL account should follow.
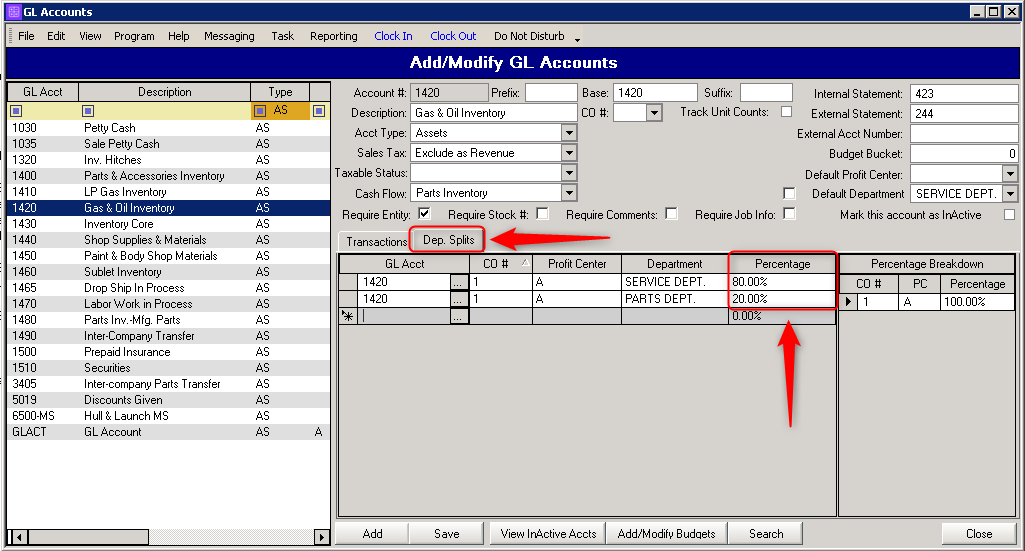
Departmental Splits
To create department splits for a GL account, click on the Dep. Splits tab.
Add the additional departments that transactions of that account should post to. Your percentage must equal 100% otherwise the transactions will not balance correctly.
Budgets
To create a budget for the specified GL account, click on the Add/Modify Budgets button on the bottom of the window. Navigate to the account where you want to add budgets. Adjust the budget buckets accordingly and make sure to save when finished. Please note that these budgets will need not be enforced unless the “Create Budgets” button is clicked.
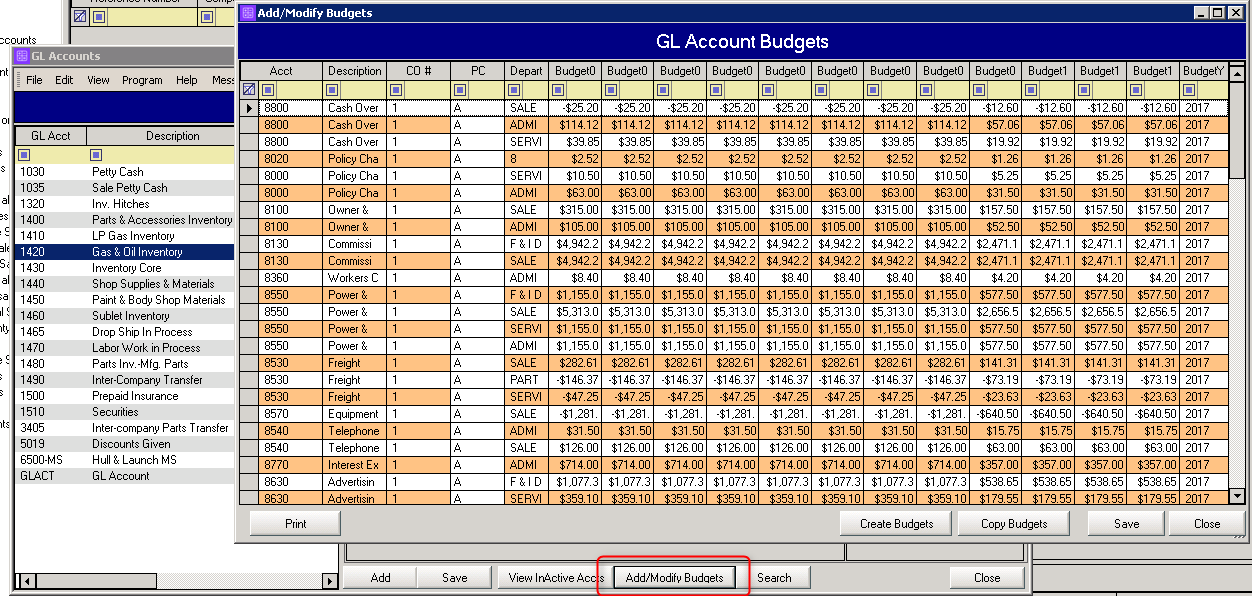
To specify which budget is currently being applied to the GL account, type in the corresponding budget bucket # into the field named Budget Bucket.