MotilityAnywhere will automatically post transactions from the various other modules such as repair orders, parts tickets, unit purchases, and deposits from deals. Even with this integration, you will occasionally need to make a manual journal entry.
|
IMPORTANT: When creating transactions, the the credit and debit amounts must balance.
Some of your transactions may need multiple lines to allocate the correct amounts to your GL accounts. |
- Open the accounting module.
- Choose the New Journal Entry option from the quick links on the left side of the screen. This will open a new window.

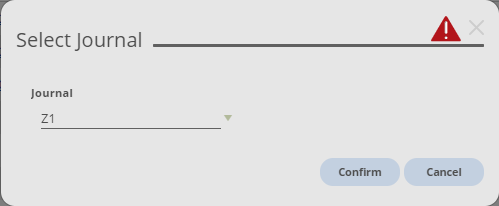
- Select the journal by typing in the journal that you wish to post to, or by clicking the drop down arrow to select the journal from the list. Typically, you will choose the Z1 or General Journal for manual accounting entries.
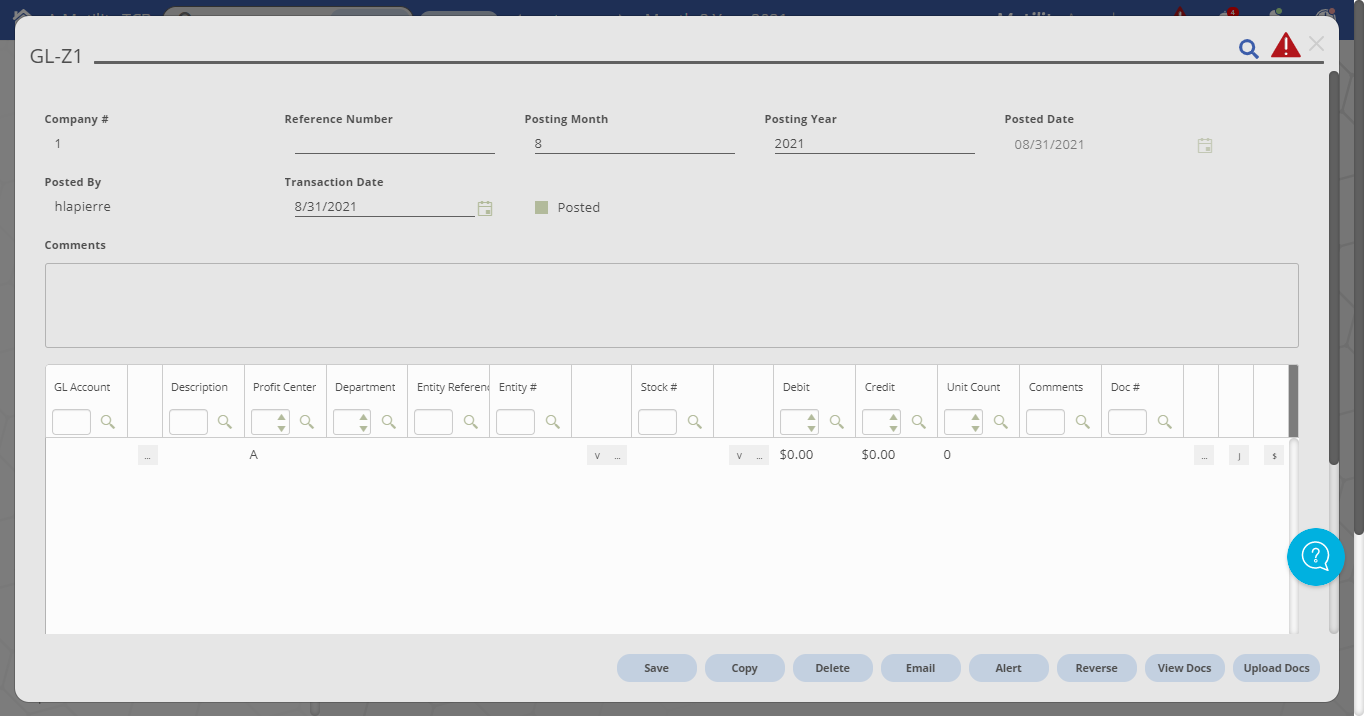
- Click OK to confirm your selection. This will open a blank transaction screen.

- The company number will default to the company that you are logged into.
- Enter a reference number for the transaction. This entry is required and is used when searching for transactions.
- Confirm that the posting month and year are correct.
- While the Posted date will automatically populate today’s date and cannot be changed, the Transaction Date will also populate today’s date, but you can adjust the date. The Posted fill box will automatically be filled in to indicate this transaction will be posted when saved.

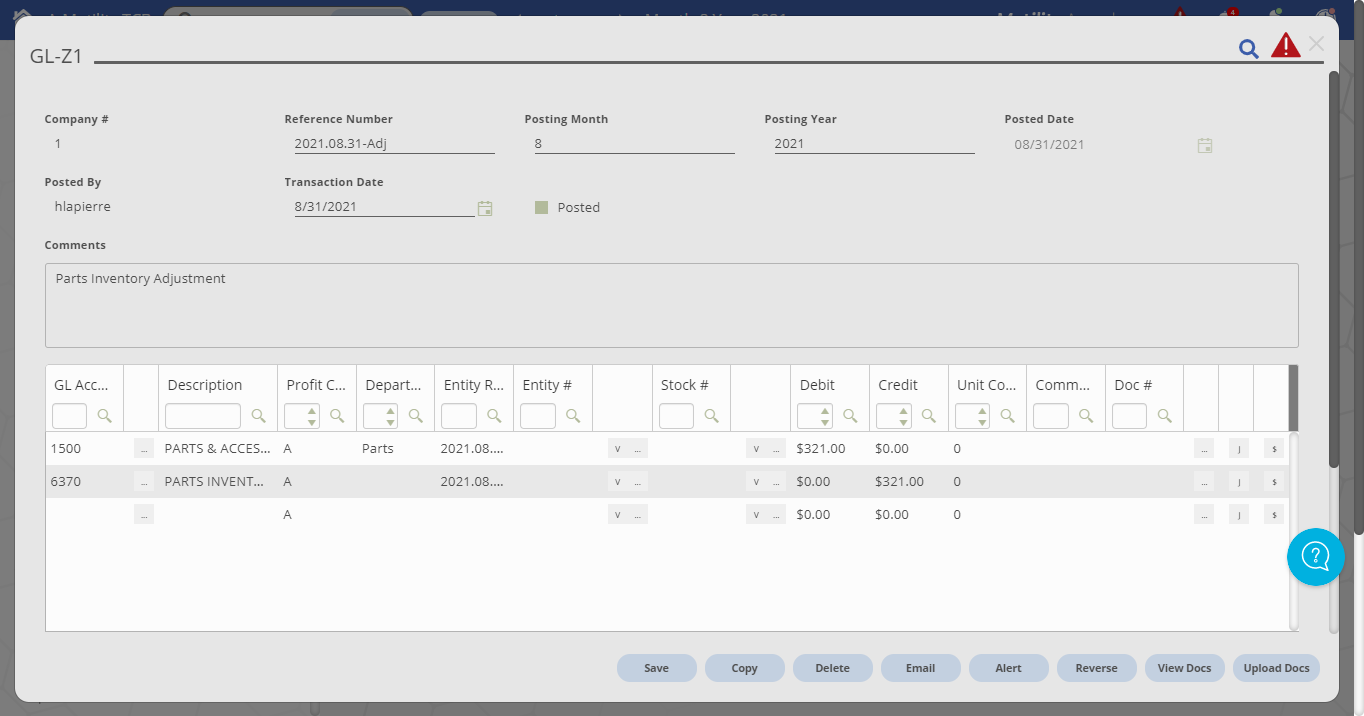
- In the first column of the posting transaction area in the middle of the screen, type the first GL account in the entry. If you are not sure which GL account you want use you can choose the ellipsis button to search for the desired account.
- The profit center will default to the profit center where you are logged in.
- The department column is optional and used if you need to override where the account(s) will post. This will affect departmental reports.
- The entity reference will autofill with the reference entered on the header. You can change this if you need to.
- The entity and stock number columns may be required if the GL account selected requires this information and it turns red to indicate that it’s required. You can use the applicable ellipsis button to look up either of these pieces of information.
- Enter the appropriate debit or credit amount for your entry.
- Optionally, you can enter into the unit count column if this entry affects a vehicle’s inventory status in the system.
- Optionally, you can enter a comment to add helpful information about the entry. This column may also be populated automatically depending on which accounts are being used in the entry.

- Add a new line to make the offsetting entry, essentially following the same steps as above.
- After entering the offset line, the program will show a debit and credit total for the transaction.
- Verify that the balance for the transaction is zero in the bottom left corner of the screen.
- After creating the entries and verifying the transaction is in balance, choose the Save button at the bottom of the screen to post the transaction.
