Reassigning a salesperson’s leads can be accomplished from the Prospect Reassignment option in the CRM. Below are the steps to achieve this.
- Click the Edit menu from the toolbar, and select Prospect Reassignment.
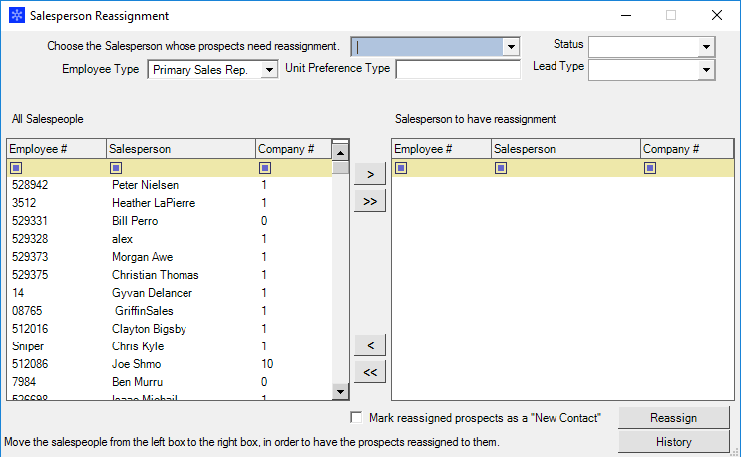
- At the top of the screen, it will prompt for you to select the salesperson whose prospects need reassignment. This is the main field to use when reassigning prospects. You can use the optional fields to limit the prospects to reassign. Leaving the optional fields blank will reassign all prospects from this salesperson.
- Optionally, you can choose a single prospect status to only reassign those prospects.
- Optionally, you can limit the employee type for the prospects you wish to reassign.
- Optionally, you can enter a unit type to limit the prospects to reassign.
- Optionally, you can select a single lead type to limit the prospects to reassign.

Right below that are two boxes, one listing all salespeople on the left, while the other side is for the salesperson or salespeople to have the previous salesperson’s prospects.
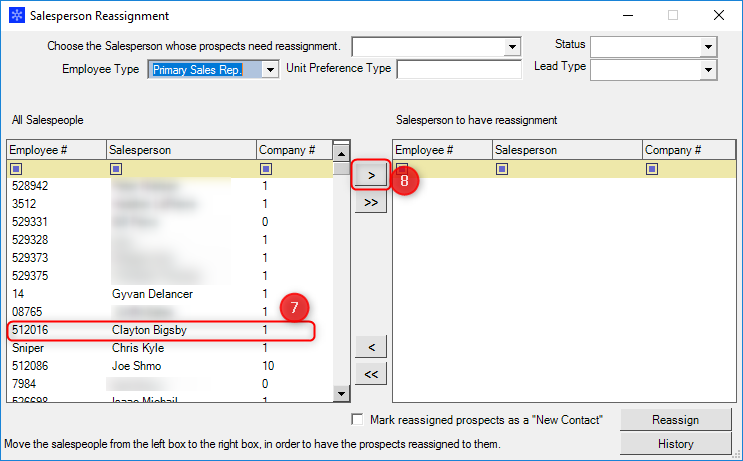
- You can select salespeople individually by clicking over their name in the list to the left. If you want to select multiple people from the list to the left, hold the CTRL button on your keyboard.
- Click the arrow at the top “>”. To move all salespeople shown in the list, click the doubled arrow “>>” button
Note: You can remove salespeople from the list on the right by performing the opposite functions with the “<” and “<<” arrows

- If you want to have the prospects who have been moved to a new salesperson to be marked as new contacts for the salesperson, check the box at the bottom of the window.
- Click the Reassign button.