Unit purchase orders can be used to order new units and allows you to enter the unit information during the order without having a stock number. This streamlines your process because when a unit is received, a stock number can be added and all the unit information will be added to your inventory.
Write a Check for Received Unit
Add a New Unit PO
- Open the Unit Inventory module.
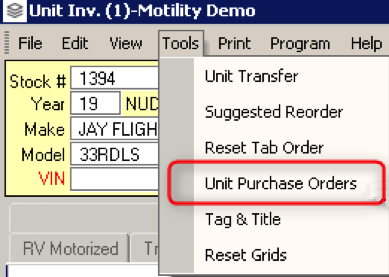
- Click the Tools menu in the upper left of the screen.
- Choose the Unit Purchase Orders option. This will open the Unit Purchase Order List.
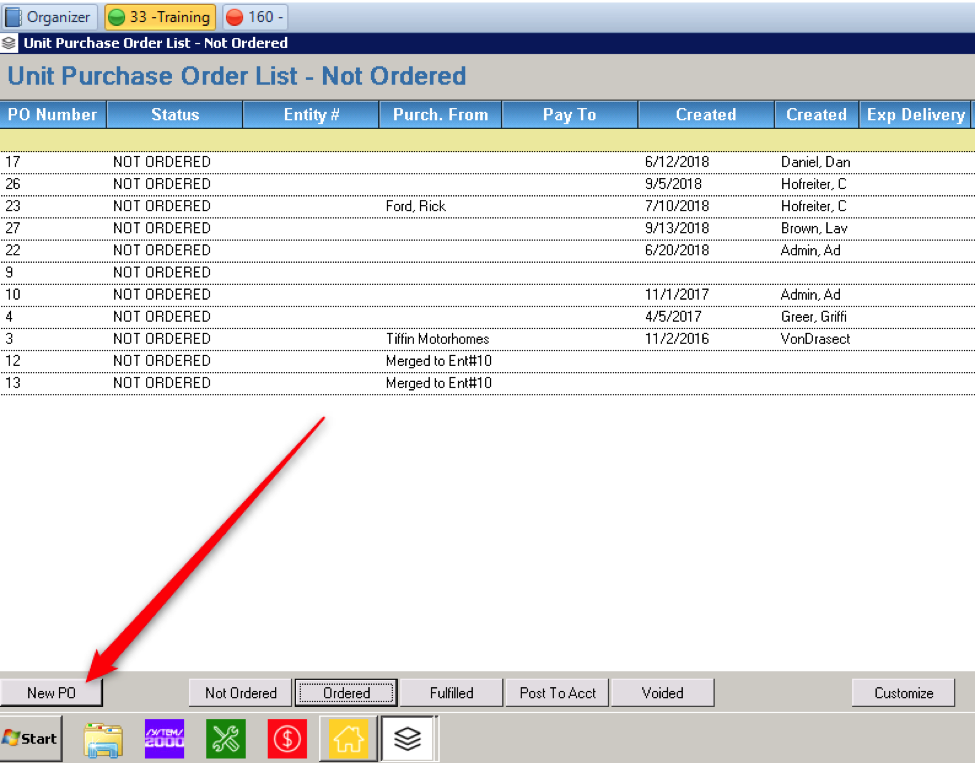
By default, the unit PO list opens to the Not Ordered list. You can use the buttons at the bottom to filter for Not Ordered, Ordered, Fulfilled, Post To Acct, or Voided orders. You can also search different criteria in the list by typing into the yellow filter bar at the top of the list

- Click the New PO button in the lower left.
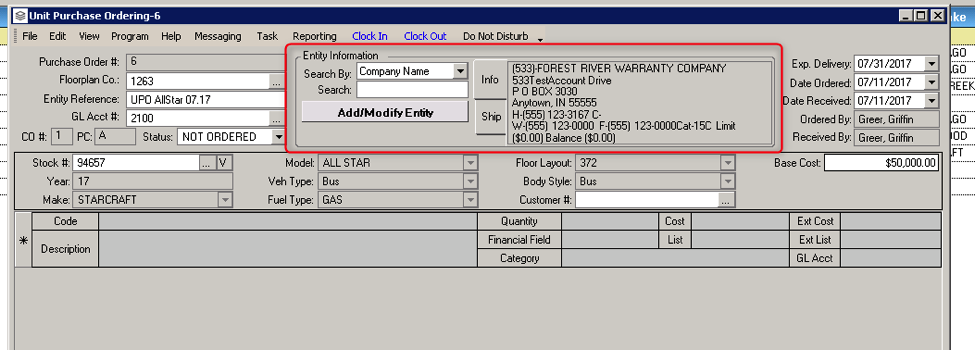
- Search for and enter the supplier at the top of the purchase order.
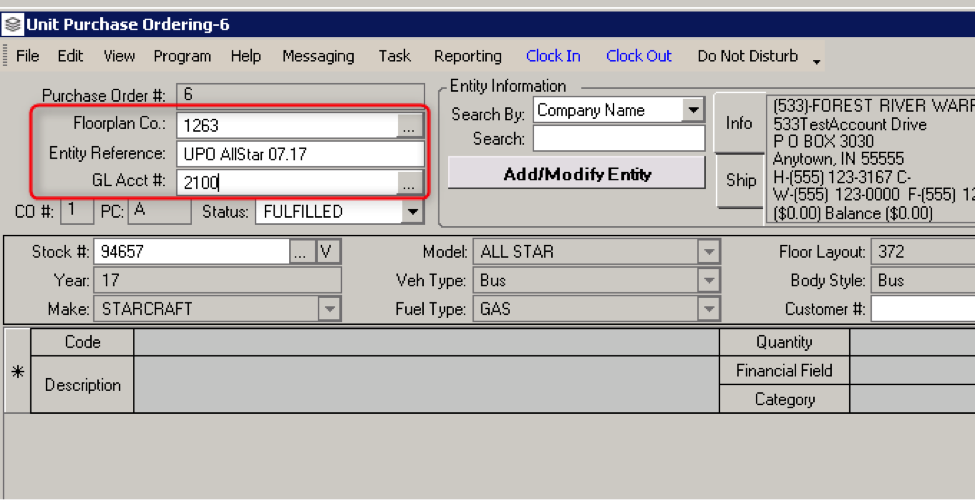
- Enter the Floorplan Company if the unit will be floored. If the unit will not be floored, enter the supplier entity number.
- Enter an entity reference number. This may be the invoice number for the order. This is used to search for this transaction in accounting.
- If the unit will be floored, select a Floorplan in the GL Account field. If the unit will not be floored, choose an AP account in the GL Acct field,
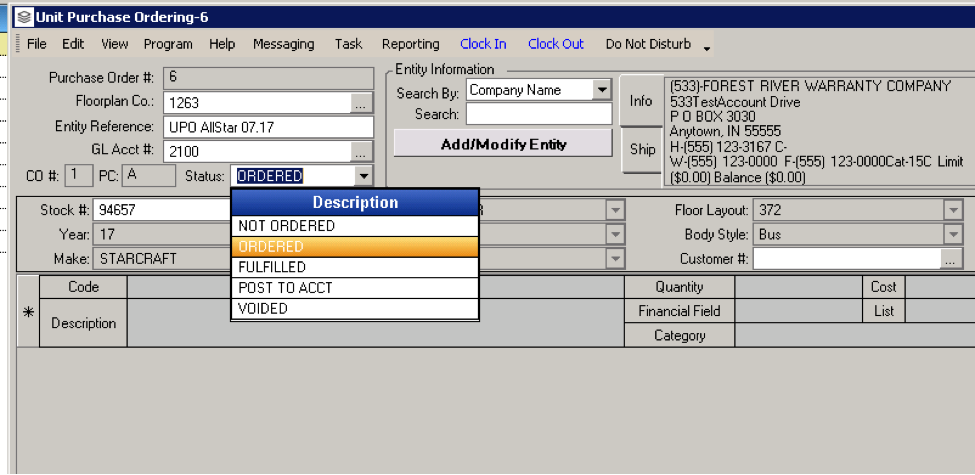
The status will begin as Not Ordered. This will update automatically as the order progresses through Not Ordered and Post To Acct. You can manually apply the statuses of Ordered and Fulfilled for more granular tracking, if desired. If needed, you can manually apply the Voided status to void the unit purchase order.
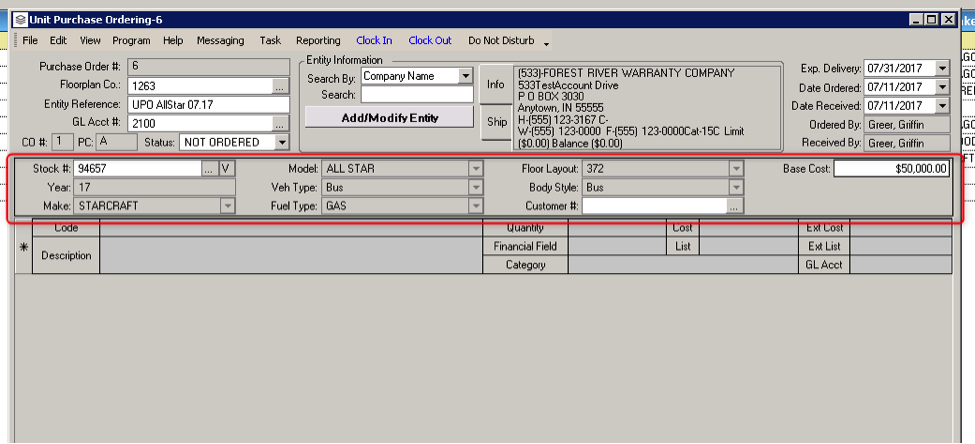
- Enter the unit information. You do NOT need to enter a stock number - the system will automatically create a temporary stock number for you when you save the order.
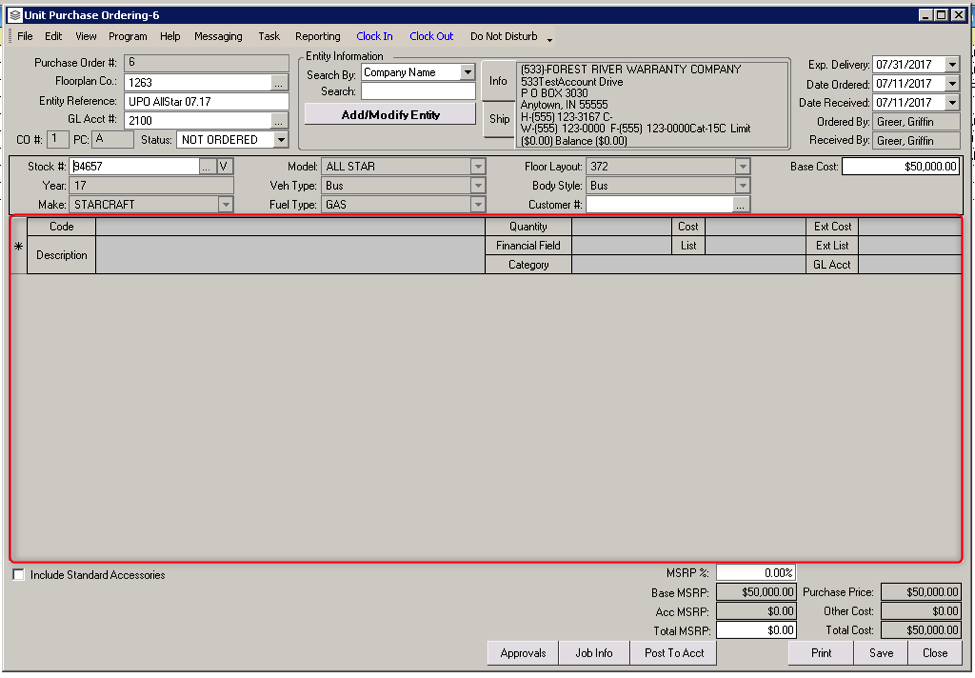
The lower section is for accessories. These will have their own GL accounts when this order is posted to accounting.
- Add each pre-installed accessory that will be added to the unit. If there is a cost or price on the accessories, these amounts will add to the total amounts at the bottom of the window.
- If your dealership has accessory codes set up, you can add them using the Code field. Otherwise, you can type in a description for the accessory.
- The Quantity field will automatically default to 1. You can update the quantity as needed.
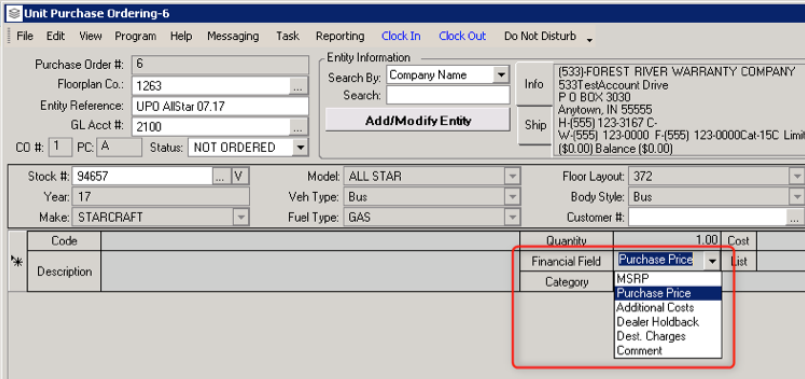
- The financial field selected will determine which field on the unit's financial tab will contain this balance.
- If categories have been applied to the accessory, it will show here. If you wish to apply a category for each accessory, you can choose it in the Category dropdown.
- Verify that the accurate cost and price is entered for each accessory. These amounts will add to the total amounts at the bottom of the window.
- The extended cost and extended price fields will automatically populate with the accessory cost multiplied by the quantity.
- Click the Save button. The temporary stock number is created. This is usually "PO" followed by the purchase order number.
- Update the purchase order status to Ordered.
- Optionally, you can print the unit order by selecting the Print button in the lower right.
Receive a Unit PO
After you have ordered a unit you can return to the unit purchase order to receive it into inventory.
- Open the Unit Inventory module.
- Click the Tools menu in the upper left of the screen.
- Choose the Unit Purchase Orders option. This will open the Unit Purchase Order List.
- By default, the unit PO list opens to the Not Ordered list. Click the Ordered button at the bottom of the screen.
- Locate the unit in the list and double-click over the row to open the order.
- Verify the cost and price of each accessory.
- Update the MSRP % with your dealership's markup.
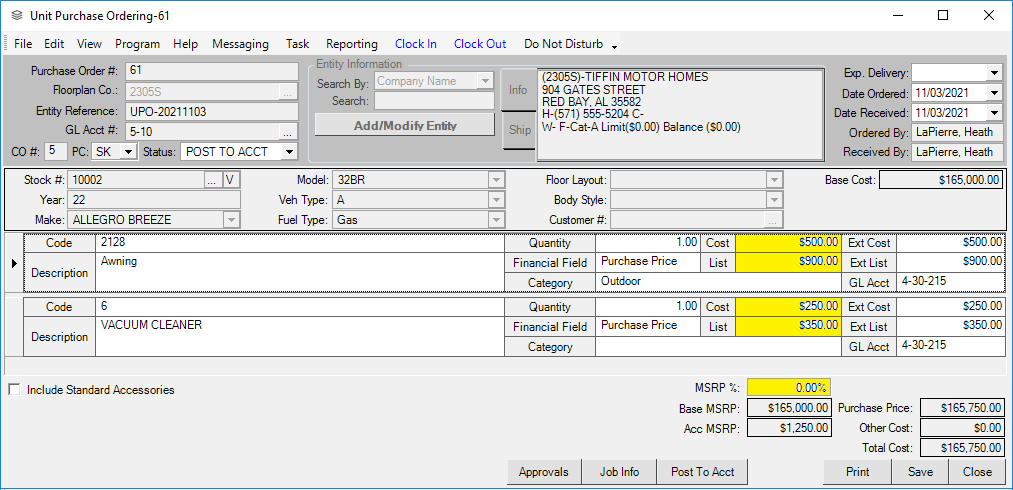
- Click the Post to Accounting button in the lower right of the window. This will update the PO status and give a popup message.
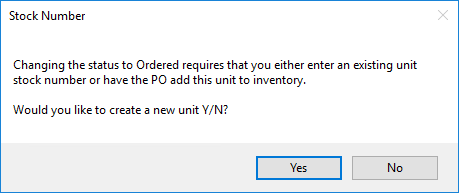
- If you have already created the unit in your inventory, click the no button to enter the stock number into the purchase order.
If you have not created the unit in your inventory before creating the unit order, click yes. This will open a prompt for the new unit stock number.
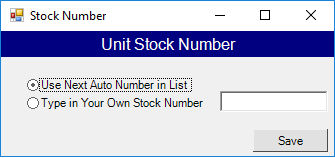
- If your dealership is using the automated stock numbering in Infinity, choose the top option. Otherwise, you may select the second option and type in the stock number you wish to use for the unit. Either of these options will add the unit to your inventory.
- Click the Save button. This will return you to the unit purchase order screen.
- Optionally, you can print the unit order by selecting the Print button in the lower right.
Write a Check for Received Unit
After a unit has been ordered, received, and posted to accounting, you will need to write a check for the payable created during the order. This payable uses the GL account listed in the upper left of the order.
- Open the Accounting module.
- Choose the Print Checks option from the quick links menu on the left side of the screen. This will open a window to view checks.
- Select the Add button at the bottom of the window. This will open a new, blank check.
- Choose the entity in the section at the top.
- Change the check Type to Floorplan.

- Locate the unit within the list.
- You may type in an amount to pay in the PayAmount column. If you are paying the entire balance, click the Pay button to the far right of the row. This will create the accounting transaction rows in the table at the bottom of the window.
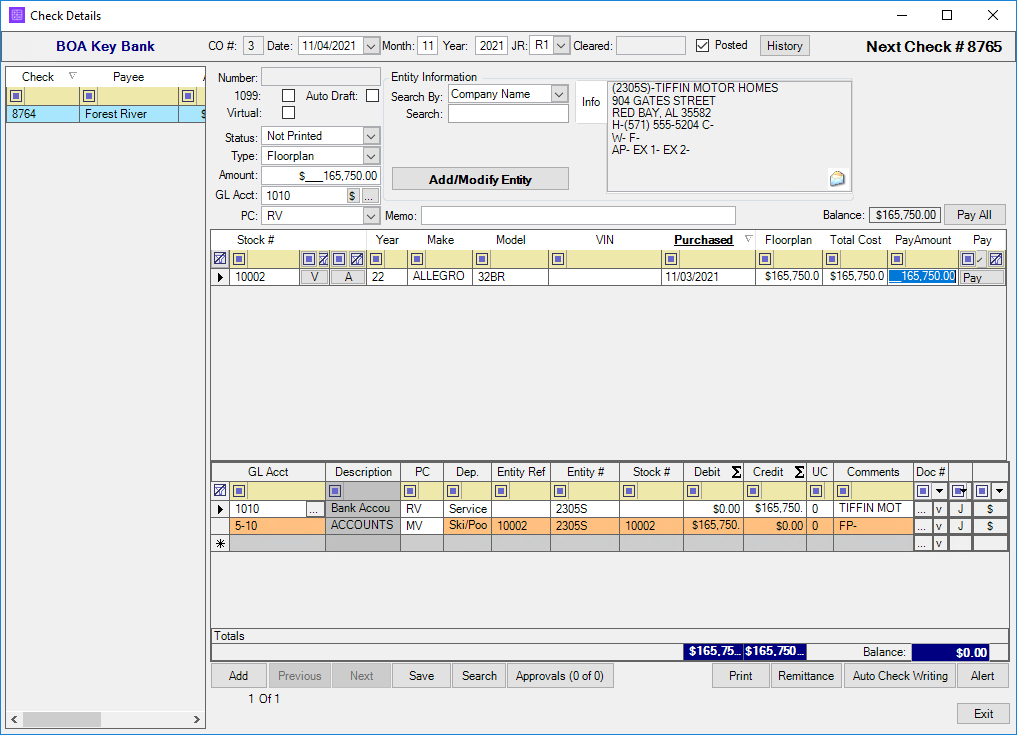
- Click the Print button at the bottom of the window to print the check.
- Choose the Exit button in the lower right when done. This will close the window.
