Accessory Codes are added to this list to be able to choose from when entering a unit to order or to easily add accessories to units on a deal. You can specify which accessories apply to specific unit makes, models, years, types and more.
Add Accessory to Multiple Makes / Models
Open Accessory Codes Window
- Open the Unit Inventory module.
- Select Edit from the menu bar at the top of the screen.
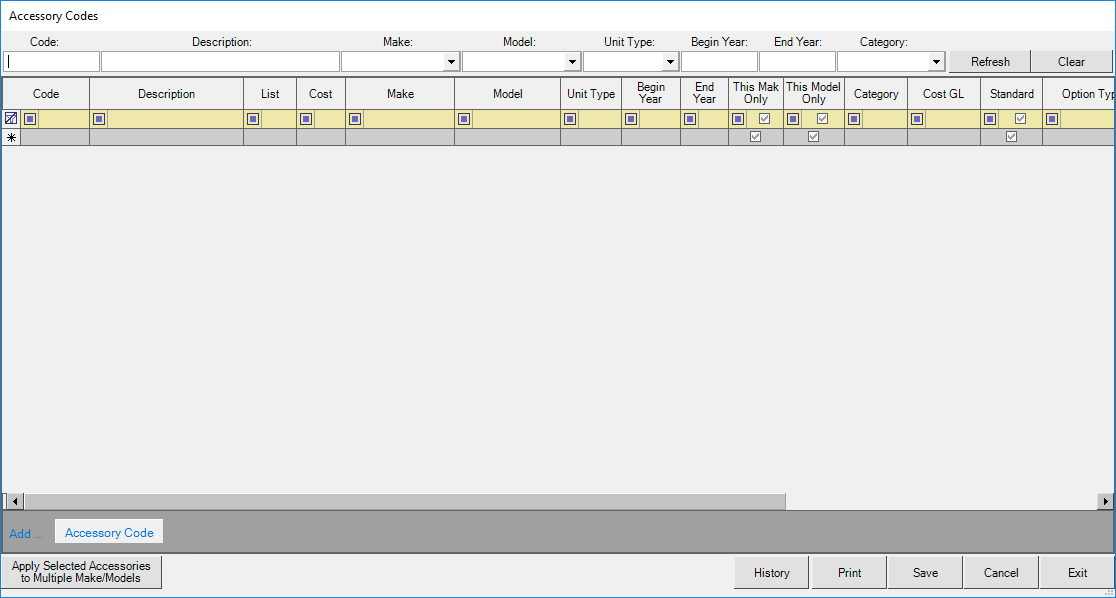
- Choose the Accessory Codes option. This will open the accessory codes window. The list will be blank.

- You can enter a search term into any of the relevant fields at the top of the list. To show all accessories, leave all fields blank. This list can show up to 2000 lines.
- Click the Refresh button to apply your search. This will populate the list of accessories.

Add an Accessory Code
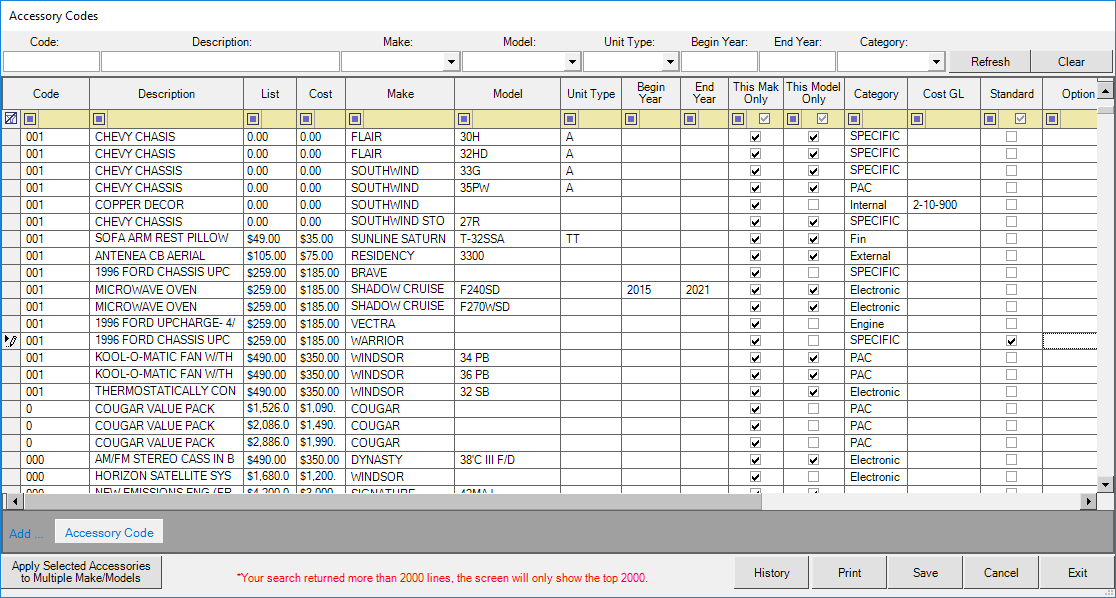
- Click the Add Accessory Code button in the lower left of the window. This will add a new blank row.
- Enter an abbreviation or code for the accessory into the code field. There may be duplicate options for a single code. Having a code allows for faster entry when adding the accessory to units or deals.
- Add the name of the new accessory in the description field.
- Enter the retail price for the accessory into the list field.
- Enter the accessory cost into the cost field.
- Optionally, you can specify a specific make for this accessory by choosing it in the make dropdown.
- Optionally, you can specify a specific model for this accessory by choosing it in the model dropdown.
- Optionally, you can choose a specific unit type for the accessory by choosing it in the unit type dropdown.
- If you want to choose vehicle years for the accessory, enter the range of years into the begin year and end year fields.
- Checking the box in the This Make Only or This Model Only columns will limit this accessory to only show when the make and/or model matches exactly what is entered into the applicable field.
- You can choose a category for the accessory using the dropdown selection box. If a category does not exist, you may type to enter it. Once entered, you will be able to choose the category for other accessories.
- If you wish to have the accessory's cost impact a specific GL account, click the ellipsis button in this column. You can then search for and select the GL account.
- If the accessory comes standard on the unit, check the box in the standard column.
- You can choose an option type for the accessory using the dropdown selection box. If the option type does not exist, you may type to enter it. Once entered, you will be able to choose the option type for other accessories.
- You can choose a mount location for the accessory using the dropdown selection box. If a mount location does not exist, you may type to enter it. Once entered, you will be able to choose the mount location for other accessories.
- You can choose a mount sub location for the accessory using the dropdown selection box. If a mount sub location does not exist, you may type to enter it. Once entered, you will be able to choose the mount sub location for other accessories.
- If the accessory is from a specific manufacturer, you may type the manufacturer name and/or manufacturer's part number into the applicable fields.
- Click the Save button in the lower right of the window.
Add Accessory to Multiple Makes / Models
After you have added an accessory, you can add it to multiple makes or models easily.
- Click over the gray box to the left of the accessory row to highlight it. You can highlight multiple rows by clicking and dragging within the gray boxes to the left of the rows, or by holding down the CTRL button on your keyboard and clicking over the gray box for each row you wish to add.
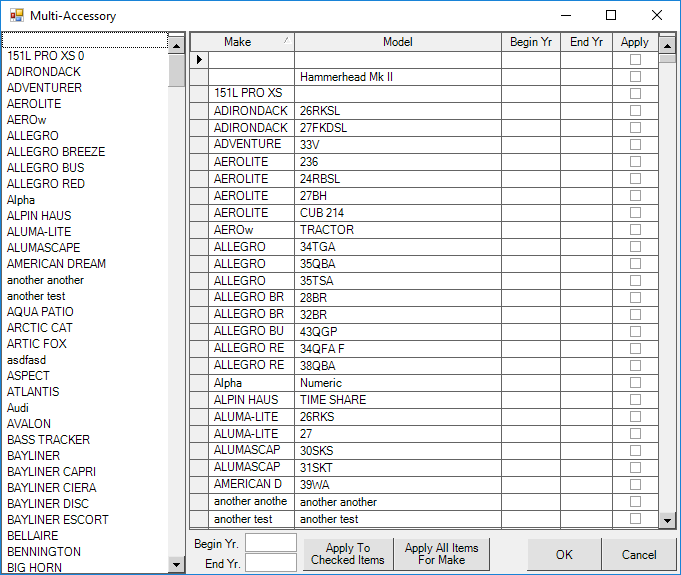
- Choose the Apply Selected Accessories to Multiple Make/Models button in the lower left of the window. This will open the multi-accessory window.

- Click over a Make name in the list to the left. You may highlight multiple make names by holding down the CTRL button on your keyboard and clicking over each make you wish to add. This will update the list of models shown in the list on the right side of the screen.

- If you wan to specify a date range for the units, you may enter the years into the Begin Year and End Year fields at the bottom of the window. These fields work in conjunction with the apply buttons outlined below.
- If you want to apply the accessory to all items for the make(s) chosen on the left side of the screen, click the Apply All Items For Make button at the bottom of the window. If the begin and end years are entered before clicking this button, the dates will fill in automatically.
- If you want to choose specific models, check the applicable row or rows in the list to the right, then choose the Apply To Checked Items button at the bottom of the window. If the begin and end years are entered before checking the model, the dates will fill in automatically.
- Click the OK button to save the changes and close this window. This will return you to the accessory codes window.